Last Updated on September 25, 2026 by Umar Farooq
Pressure washer carburetor cleaning works because the fault is almost never the carburetor itself — it is a film of fuel varnish sitting inside holes that were drilled to a tolerance, and solvent plus compressed air takes it out. The part is not worn. It is blocked. Those are different problems with very different price tags, and the whole point of an afternoon with the bowl off is to find out which one you have before you buy anything.
This page is about the component and the procedure: what gums up, what to try first, how to strip and clean it properly, and the point at which a new carburetor is the cheaper answer. If you are still working out *whether* the carburetor is your fault, the symptom belongs to pressure washer starts then dies, which runs the diagnosis. Come back here once the answer is yes.
One boundary: everything below assumes a gas engine with a float-bowl carburetor. Flooding, backfiring and cold-start faults have their own causes and are not covered here. Electric machines have no carburetor at all, which is the single best thing about them.
Why a Pressure Washer Carburetor Gums Up in the First Place
Petrol is not one substance. It is a blend of hydrocarbons with different boiling points, and the light ones leave first. What stays behind is the heavy end, which oxidises in contact with air and slowly polymerises into the gold-brown film every small-engine mechanic calls varnish. It is sticky, it is thin, and it is very good at settling in exactly the places you cannot see.

Three features of a pressure washer carburetor make it worse than most:
- The bowl is vented to atmosphere. It has to be, or fuel could not leave it. That also makes it an evaporating dish with a lid on, sitting a few inches from a hot exhaust.
- The bowl never fully drains. Shut the fuel valve and run the engine until it stops and you have emptied the tank and the line. The bowl still holds a film, and a film is exactly what dries to varnish. Volume is not the problem; surface area is.
- Ethanol brings water. The US Department of Energy notes that “most of U.S. gasoline contains up to 10% ethanol” (Alternative Fuels Data Center, Ethanol Blends). Ethanol pulls water vapour out of the air above the fuel, and water finds the lowest point in the system — the bowl, which is also where the jets draw from.
None of that matters while the machine is used weekly. It all matters the moment it goes in a shed in September.
The Four Places It Blocks, in Order of Hole Size
A carburetor is not one fuel passage. It is several, sized differently, and varnish closes the small ones first. Knowing which circuit is shut tells you what you will feel when you pull the cord.
| Part | What it does | What it feels like blocked |
| Pilot (low-speed) jet | Meters fuel at idle and just off idle. Smallest hole in the machine. | Fires, runs on choke, dies the second the choke opens |
| Emulsion tube | Brass tube with a row of pinholes down its side; pre-mixes air into fuel before it reaches the throat | Hunting, surging, a mixture that will not settle at any throttle |
| Main jet | Meters fuel at speed and under load. Often *is* the bowl nut, with cross-drilled holes through its side. | Runs at idle, sags or stalls the moment the pump loads it |
| Bowl vent / air bleeds | Let the bowl breathe and let air into the fuel circuits | Starves after 30 seconds to a few minutes, then restarts happily |
Two sets of holes deserve naming, because almost nothing mentions them. The air bleeds are not fuel holes at all — they are tiny drillings that feed metered air into the fuel circuit so the fuel arrives at the throat already aerated. Block one and the circuit goes rich rather than lean, which is why a half-cleaned carburetor sometimes comes back worse than it went in. The transfer ports are the two or three pinholes in the throat wall just behind the throttle plate, and they carry the engine from idle up to working throttle. Miss those with the carb cleaner and you get a machine that idles beautifully and stumbles every time it is asked to do anything.
Try the Drain-and-Spray Before You Take Anything Off
There is a cheap version of this job that takes twenty minutes and sometimes works completely. It is worth doing first, on the honest grounds that you may not need the afternoon.
Before anything else, and once only: carburetor cleaner is an extremely flammable aerosol and a skin and eye irritant, and you are going to spill petrol doing this. Work outdoors, well away from the hot exhaust and anything with a pilot light, wear eye protection and nitrile gloves, catch fuel in a container rather than on the floor, and let the engine go cold first. That is the safety talk. It does not need repeating in every step below.
1. Shut the fuel valve and pull the spark plug lead. Squeeze the trigger with the engine off to depressurise the pump.
2. Drain the bowl. Many engines have a drain screw for exactly this. Honda’s own storage instruction is to “loosen the carburetor drain screw, and drain the carburetor into an approved gasoline container. After draining is completed, tighten the carburetor drain screw” (Honda Engines, storage and transportation). If there is no screw, put a container underneath and slacken the bowl nut instead.
3. Look at what came out. Gold-brown and syrupy is varnish. Beads sitting separately from the fuel are water. Grit is a failed tank screen. All three are answers.
4. Drain the tank and the line too. Old fuel in, old fuel back in the bowl.
5. Spray the throat. Air filter off, aerosol carburetor cleaner into the venturi and down onto the throttle plate, then leave it a couple of minutes.
6. Refill with fresh petrol and, if you want, an in-tank fuel system cleaner rated for small engines.
7. Run it for ten minutes with the water connected and the tap open, working the throttle.

Where the shortcut fails, and why. Draining and spraying reaches only what bulk fuel and aerosol can reach: the bowl, the throat, the throttle plate, the main jet if you are lucky. It does not reach the pilot circuit, which is a dead-end passage fuel travels only at idle, and nothing sprayed into the throat goes up it backwards. So the rule is simple. If the machine runs on choke and dies when the choke opens, the shortcut will not fix it, because the choke was bypassing precisely the circuit the shortcut cannot reach. Try it anyway, since it costs twenty minutes and a gallon of fresh petrol. Then get the bowl off.
Pressure Washer Carburetor Cleaning: The Full Strip
Here is the part that repays doing carefully. Nothing in it is difficult. Everything in it is easy to reassemble wrongly.
Photograph first, from three angles, before you loosen a single fastener:
- The governor and throttle springs, and specifically which hole each hooked end sits in. Most linkage plates have several. Put a spring back one hole over and the engine either hunts permanently or runs away under load, and you will spend an hour blaming the carburetor you just cleaned.
- The fuel line routing and clamp positions, because the line has a memory and will fight you.
- The gasket and spacer stack between the carburetor and the head, in order and orientation. The insulating spacer usually only goes on one way round, and its passages have to line up.
Then the sequence:
1. Fuel valve off, tank drained or the line clamped, spark plug lead off and tucked away from the plug.
2. Air filter and its housing off. Note where the breather hose goes.
3. Unhook the linkage. Move the springs, do not stretch them.
4. Unbolt the carburetor from its two studs and lift it off with the gaskets. Catch the spacer.
5. Bowl off. Empty it, then look inside for white powdery deposits as well as varnish — that distinction matters later.
6. Float pin out, float and needle out. There is usually a wire clip linking the float tab to the needle. It is small, it is easy to launch across a garage, and it is not optional.
7. Main jet out of the bowl nut or its tower. Pilot jet out — a small brass screw beside the main jet tower, sometimes hidden under a pressed-in plug. Emulsion tube out, which usually pushes downward out of the tower once the main jet has gone.
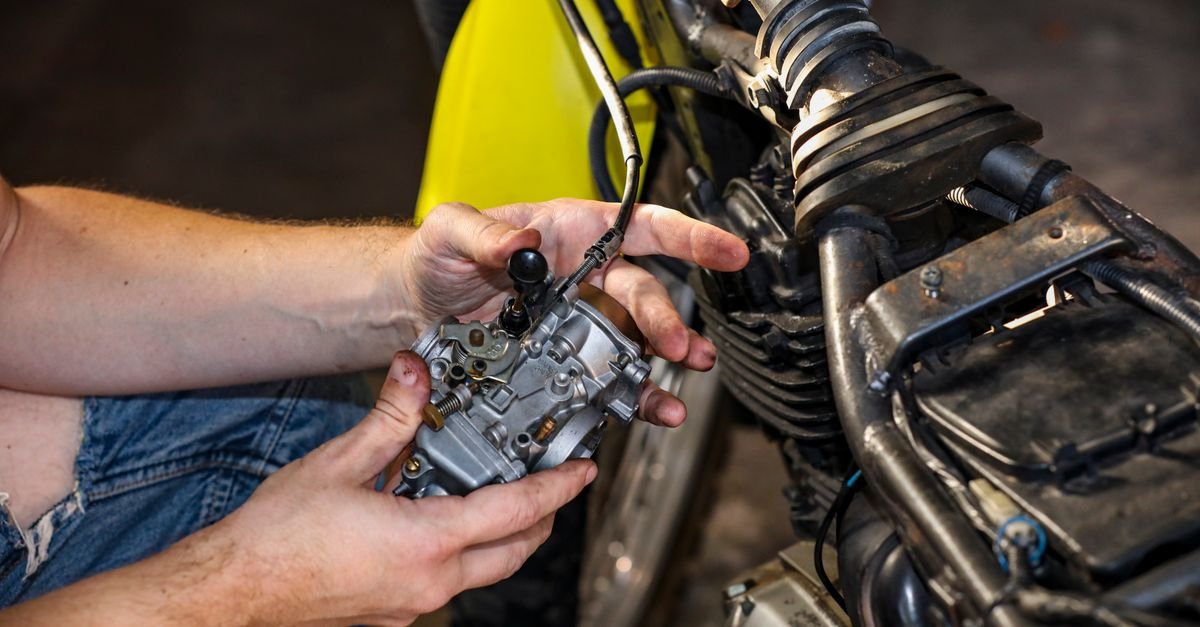
Then clean, in this order: carburetor cleaner through every passage you can find, from both ends, until it comes out clean. Compressed air through every one of those same passages afterwards, again from both ends — solvent loosens varnish and air is what removes it. Hold each jet up to daylight and confirm you can see a round, clean circle of sky through it. Do the emulsion tube’s side holes one at a time. Do the transfer ports in the throat. Do the bowl vent.
Keep the air nozzle well away from the needle seat while the float assembly is out, and never blow full line pressure into an assembled carburetor. You can drive the needle into its seat hard enough to mark it, which converts a cleaning job into a parts job.
Nothing Metal Goes Through a Jet, Ever
This is the single most expensive mistake available in this job, it takes two seconds, and it is invisible afterwards.
A jet is not a hole. It is a calibrated orifice, machined in soft brass to a specific diameter because that diameter is what sets the fuel curve. Flow through an orifice tracks its cross-sectional area, so the arithmetic is unforgiving: open a 0.50 mm jet to 0.55 mm with a pin and you have not made it 10% bigger, you have made it about 21% bigger, and the engine will run rich by roughly that much forever. Brass does not close back up, and there is no adjustment anywhere on the engine that undoes it.
What you get afterwards is a machine that starts, smokes black, fouls plugs, drinks fuel and never quite settles — a fault that looks nothing like the one you started with, which is why people chase it for months. Wire, pins, paperclips, sewing needles, drill bits, the corner of a scouring pad: none of them go near a jet.
Use instead: carburetor cleaner, compressed air, and a second application of both. If a jet genuinely will not clear, an overnight soak in a proper carburetor dip usually finishes it. If it still will not clear, buy the jet — a replacement is a trivial part and always cheaper than the fault you create trying to save it.
Gaskets, the Bowl O-Ring and the Leak You Invented
The machine went into this job without a fuel leak. A surprising number come out of it with one, and the reason is not carelessness — it is materials science, and it has been measured.
Oak Ridge National Laboratory exposed fluorocarbon, fluorosilicone, nitrile rubber, polyurethane, neoprene, SBR and silicone to test fuels including a 10% ethanol gasoline blend for four weeks. “All elastomer materials experienced volume expansion and softening when wetted by the test fuels.” Then they dried the samples and measured again: “NBRs and neoprene exhibited shrinkage and embrittlement associated with the extraction of plasticizers” (Kass et al., Compatibility Assessment of Elastomer Materials to Test Fuels, ORNL).
Nitrile is the common bowl gasket and O-ring material. So the sequence on your bench is: a seal that has spent years swollen and soft, taken off, allowed to dry, shrunk, hardened, and then asked to seal a groove it no longer fits. It sealed yesterday because it was wet. It will not seal tomorrow because it is not.
What to do about it:
- Buy the gasket and O-ring kit before you start the job, not after. Standing in a queue on a Sunday holding a hardened rubber ring is a poor use of a weekend.
- Never stretch an O-ring to reach its groove. Stretching thins it, and a thinned ring seals worse than the old one.
- A square-section bowl gasket that has taken a permanent set will not recover, and neither will one with a bright witness mark pressed into it.
- No sealant, no gasket goo, nothing on the mating faces. It squeezes into passages, sets, and becomes a blockage that looks exactly like the one you came here to remove.
- Check the float needle tip while it is out. Most are rubber-tipped, and a visible ring around the cone means it has been seating in one spot for years and will not shut off cleanly.
And do not answer a weeping bowl by tightening the nut harder. You are crushing a gasket that is already crushed, and the next step after that is a stripped thread in an aluminium casting.
Float Height, Reassembly and the First Start
The float sets the fuel level in the bowl, and the fuel level sets the head of fuel the jets draw against. Too high and the machine runs rich and seeps from the overflow. Too low and it runs lean and sags the instant the pump asks for power. It is the quietest adjustment on the engine and the one most likely to be disturbed by a clumsy afternoon.
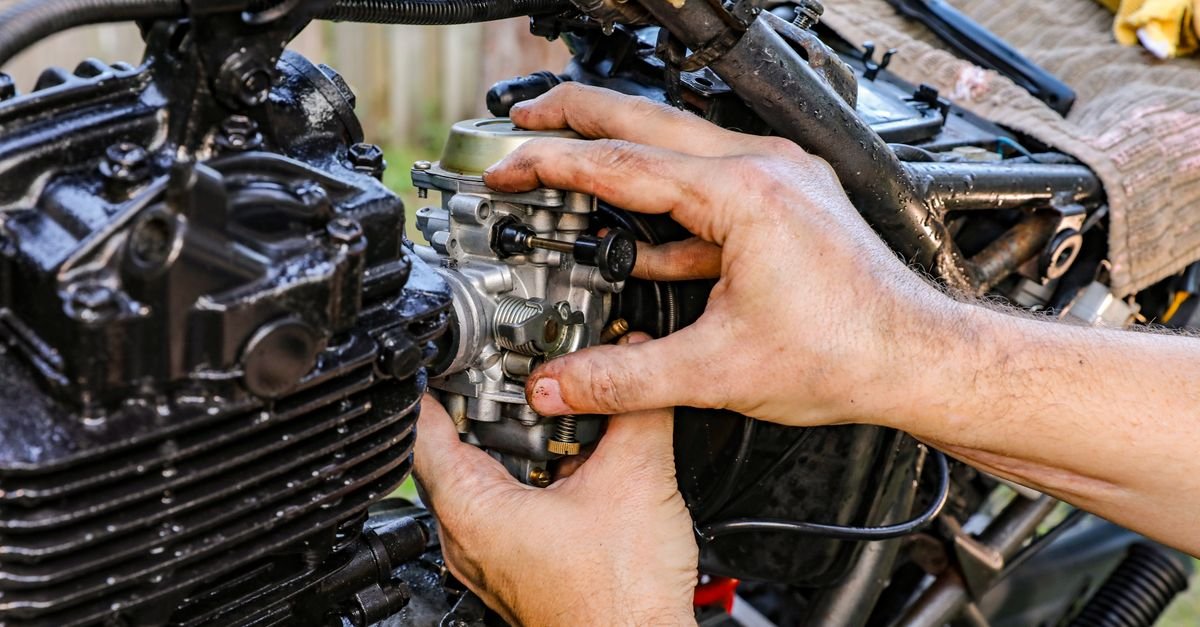
How to check it. Turn the carburetor upside down so the float rests on the needle under its own weight. On most residential engines the float should then sit roughly parallel to the bowl mating face. Do not press the float down to “make sure” the needle is seated — many needles have a tiny spring-loaded damper pin in the top, and compressing it makes the reading meaningless.
I went looking for a universal float height figure worth publishing and there is not one. It is specified per carburetor, in the engine’s service manual, in millimetres from the mating face to the top of the float. Find that figure before you bend a tab. If your float is a one-piece moulding with no tab there is nothing to adjust, and a float that is visibly off is a waterlogged float or a needle that is not seating.
Reassembly runs in reverse, with three things worth saying out loud. The spacer and gaskets go back in the order and orientation you photographed, passages lined up. Linkage springs go back in the holes you photographed, not the holes that look right. And the bowl nut gets tightened firmly and then left alone — it is threaded into aluminium and it seals with a gasket, not with force.
The first start. Open the fuel valve and then wait, watching, before you touch the recoil. Give it a full minute for the bowl to fill and for any leak to show itself. Connect the water supply and open the tap, because the engine will run dry quite happily while the pump tears itself apart behind it. Then start it, and expect twenty or thirty seconds of roughness and a haze of white smoke while residual solvent burns off. That is the carburetor cleaner leaving, not the engine failing. If it is still hunting after two minutes at working throttle, the emulsion tube or a transfer port did not get clean.
When a Replacement Carburetor Beats Another Saturday
Here is the opinion, and it is the one part of this article a repair shop would be reluctant to print: if the throttle shaft rocks in its bore, stop cleaning and buy the carburetor. Hold the body, take the throttle lever between finger and thumb and try to move it sideways. Any perceptible play means the shaft has worn its bore oval, and a worn bore draws unmetered air straight into the throat below the throttle plate. That air is not going through any jet, so no amount of solvent changes it. This is the machine that gets cleaned twice, hunts both times, and convinces its owner that small engines are unknowable.
Three more conditions where cleaning has already lost:
- White powdery deposits inside the bowl or around the jet tower. That is the aluminium casting corroding, usually after water sat in it through a winter. Solvent does not restore a pitted needle seat or a corroded passage.
- A snapped pilot jet or a stripped bowl nut thread. Both are common, both happen to people being careful, and neither is repairable at home.
- A carburetor you have already cleaned properly once this season. If it gummed again in weeks, the fault is upstream — the tank, the fuel, or the storage habit — and a new carburetor will gum up too.
On the money: complete replacement carburetors for common residential engines are commodity parts and usually arrive with the gaskets included, which matters, because a gasket kit alone is often most of the price of the whole assembly. I am not going to quote a figure, because it varies by engine and by month and any number I put here would be wrong by the time you read it. Price the part, price the kit, and compare both against what the machine is worth — the same arithmetic as the pressure washer repair guide. Do the comparison before you commit a second afternoon, not after.
Stabilise It or Run It Dry: Pick One
Everything above is a consequence of fuel left standing. There are exactly two prevention strategies that work, and most people do neither properly because they do half of each.
Option one: stabilise it. Honda’s storage guidance is to fill the tank with fresh petrol and add stabiliser according to its instructions. The step everyone skips is the one that makes it work: run the engine for several minutes afterwards. Stabiliser protects only the fuel it is mixed into. Pour it in the tank, shut the machine in a shed, and the bowl and the line are still holding untreated petrol — which is the fuel that actually matters, because the bowl is where the varnish forms. Honda also notes that stabilisers have their own shelf life and will not reconstitute fuel that has already gone stale, which is worth knowing before you treat a tank of last summer’s petrol and hope.
Option two: run it dry. Shut the fuel valve with the engine running and let it consume what is in the bowl until it stops. That leaves the bowl empty, which is the best state it can be in. It does not leave it clean — a film stays behind and dries — so if the engine has a bowl drain screw, open it afterwards and let the last of it out.
Either works. In combination they work better: fresh stabilised fuel run through the whole system, then the bowl drained at the screw. That is five minutes in September against an afternoon in April, and the full seasonal routine is in the winterizing guide. The habit underneath both is duller than either: buy petrol in amounts you will use, and do not keep a can from last summer for a machine you run twice a year. The can is the reservoir. The carburetor is only where it ends up.
FAQ
How do I know if my pressure washer carburetor is clogged?
Take the bowl off and look, because that is a definitive answer and everything else is inference. A gold-brown varnish film inside the bowl, water beads sitting separately from the fuel, or a jet you cannot see daylight through all confirm it. From the outside, the strongest signal is an engine that runs with the choke closed and dies when it opens.
Can you clean a pressure washer carburetor without removing it?
Partly. Draining the bowl, refilling with fresh fuel and spraying carburetor cleaner into the throat will clear surface deposits, a mildly restricted main jet and a sticky throttle plate, and it takes twenty minutes. It cannot clear the pilot jet or the emulsion tube, because those are dead-end passages that nothing sprayed into the throat reaches. Try it first; if the choke symptom persists, the carburetor has to come off.
What can I use to clean a carburetor if I do not have carb cleaner?
Fresh petrol shifts light varnish and is what you have to hand, but it is a weak solvent for hardened deposits and not something to spray around. A dedicated aerosol carburetor cleaner or a soak-style carburetor dip is the right tool, and both are cheap. Brake cleaner attacks some plastics and rubber, so keep it away from the float, the needle tip and any seal.
Will a fuel additive fix a clogged carburetor?
Sometimes, on a mild clog, and it is worth one tankful before you start undoing bolts. An in-tank fuel system cleaner circulates through the main circuit while the engine runs and can dissolve a partial restriction. It will not clear a fully blocked pilot jet, because the engine never runs long enough off choke to circulate anything through it.
Do I need to replace the gaskets when I clean a carburetor?
Assume yes and buy the kit before you start. Nitrile and neoprene seals swell and soften while they sit in fuel, then shrink and embrittle once they dry out, so a gasket that sealed perfectly while wet often will not seal after a day on a bench. The bowl gasket or O-ring is the one that leaks, and a fuel leak next to a hot exhaust is not worth accepting.
Is it cheaper to clean or replace a pressure washer carburetor?
Cleaning is cheaper in parts and dearer in time. Replacement makes sense when the throttle shaft has play in its bore, when the casting shows corrosion, when a jet or thread is damaged, or when you cleaned it properly this season and it clogged again anyway. Complete carburetors for common residential engines usually include the gaskets, so price that against a gasket kit before deciding.
How long does it take to clean a pressure washer carburetor?
The drain-and-spray version is about twenty minutes. A full removal, strip, clean and reassembly is a realistic two to three hours the first time, and roughly an hour once you know where your engine hides the pilot jet. Add an overnight soak if the deposits are hard.
Why does my pressure washer still run badly after I cleaned the carburetor?
Three usual causes, in order. A linkage spring went back in the wrong hole, which gives hunting or overspeed and is fixed by your photographs. The emulsion tube or a transfer port was missed, which gives surging at working throttle. Or the throttle shaft is worn and drawing unmetered air, which cleaning cannot address at all.
Varnish Is a Storage Fault Wearing a Mechanical Costume
Nothing in a carburetor wears out in an afternoon. What closed those passages arrived as a liquid, sat still for a season and turned solid, and the casting underneath is usually in the condition it was in the day the machine was bought. That is genuinely good news to be holding at a workbench.
So work in order. Drain and spray first, because it takes twenty minutes and sometimes ends the job. Strip it properly if the choke test says the pilot circuit is shut. Buy the gaskets before you need them, put nothing metal through a jet, and check the throttle shaft for play before committing to a second round of cleaning something that cannot be cleaned.
And when it starts and settles and you are standing there listening to it idle, shut the fuel valve and let it run itself out before it goes back in the shed. It is the shortest job on this page, and the one that decides whether you read the rest of it again next spring.