Last Updated on October 4, 2026 by Umar Farooq
How do you winterize a pressure washer? Flush the pump with clean water, squeeze the trigger to release trapped pressure, drain the hose, gun and wand, then push pump saver fluid through the inlet until it comes out the other side. On gas models, add fuel stabilizer to fresh fuel and run the engine two minutes so treated fuel reaches the carburetor. Store the machine somewhere dry and above freezing.
Learning how to winterize a pressure washer takes about fifteen minutes once a year, and it prevents the single most expensive failure these machines suffer: a frozen pump. Water left inside the pump expands roughly 9% when it freezes. The pump housing does not stretch. Something has to give — usually a hairline crack in the manifold, or pistons locked so hard the motor cannot turn them.
Here is the part that stings. That repair is almost never worth doing. Replacing the pump on a typical homeowner machine costs a large share of what a new machine costs. So the machine gets thrown away over fifteen minutes of skipped work.
This guide covers the full sequence for gas and electric machines, how to flush the pump properly, what actually protects the seals, where to store the unit, and how to bring it back to life in spring.
Why Freezing Destroys a Pressure Washer Pump
A pressure washer pump is a small block of aluminum or brass with narrow internal passages, three tiny pistons, ceramic plungers and a set of rubber seals and O-rings. Even after you disconnect everything, a few ounces of water stay trapped in those passages by surface tension. There is nowhere for that water to go.
When it freezes, it expands. The expansion happens in a sealed cavity, so the pressure has to escape somewhere:
- The manifold cracks. Often a hairline you cannot see until the machine leaks under load.
- The unloader valve seizes. The machine runs but will not build pressure.
- The plungers lock. An electric motor will hum and trip its breaker. A gas engine will be almost impossible to pull.
- Seals and O-rings tear. Ice sliding past a rubber lip nicks it permanently.
Freezing is not the only enemy either. Water sitting still all winter also corrodes the inside of the pump and lets mineral deposits harden in the valves. That is why winterizing is a flush *and* a fill, not just a drain.
What Fails at What Temperature
Air temperature is not the same as pump temperature. A pump full of water inside a metal housing needs several hours below freezing before the water actually turns to ice. The table below reflects sustained temperature, not a brief overnight dip.
| Sustained temperature | What happens inside the pump | Typical outcome | Cost relative to a new machine |
| 40°F and above | Nothing. Water stays liquid | Safe | — |
| 33–39°F | Safe from ice, but condensation and corrosion begin | Slow internal wear | Negligible |
| 28–32°F for 4–6 hours | Surface ice forms in the passages | Seals stressed, may still run | 5–15% (seal kit) |
| 20–27°F overnight | Full freeze in the manifold | Cracked manifold or seized unloader | 40–70% (pump replacement) |
| Below 20°F for 24 hours | Complete freeze plus expansion in valves | Cracked housing, locked plungers | 60–100% (machine written off) |
The follow-up question everyone has: does one cold night ruin it? Usually not, if the pump was already empty. A pump that still holds water and sits through one hard night at 20°F very often does not survive. Do not gamble on a forecast — winterize once and stop worrying.
How to Winterize a Pressure Washer in 9 Steps
Do these in order. Steps 5 and 6 apply to gas machines only.
Step 1: Run the Detergent Out of the System
Put the detergent siphon tube in a bucket of clean water and run the machine on the low-pressure soap setting for about two minutes. Detergent left in the injector and chemical passages dries into a crust over winter and blocks the soap draw next spring. If your soap dispenser is already misbehaving, fix it now rather than in April — see why a pressure washer soap dispenser stops working.
Step 2: Flush the Pump With Clean Water
With the garden hose still connected, run the machine on low pressure for two minutes with clean water only. This pushes out sediment, mineral scale and any leftover chemical. Briggs & Stratton recommends exactly this in its winterize and store guidance, and it matters more than most people think — grit left in the inlet valves is a common cause of weak pressure the following season.
Step 3: Release the Trapped Pressure
Shut the engine or motor off. Turn off the water supply. Now squeeze the trigger and hold it until nothing more comes out. There is stored pressure in the hose and pump even after shutdown, and releasing it protects the seals and makes the fittings safe to disconnect.
Step 4: Drain the Hose, Gun and Wand
Disconnect the garden hose and the high-pressure hose. Hold the high-pressure hose vertically and walk it out so the water runs to one end. Drain the gun and wand separately, and pull the nozzles off the quick-connect and shake them dry.
A frozen high-pressure hose is a real failure mode. Ice inside the hose swells the inner liner and creates a weak spot that bursts under load next season. Coil hoses loosely — a tight coil in the cold sets a permanent kink.
Step 5: Treat or Empty the Fuel (Gas Only)
Old gasoline is the second biggest killer of these machines. Ethanol-blended fuel absorbs water and separates in storage, and the varnish it leaves behind blocks the carburetor jet. Pick one strategy from the table further down — treated fuel or a dry tank — and commit to it. Half-measures are what cause a machine that will not start in spring.
Step 6: Change the Oil Before It Sits (Gas Only)
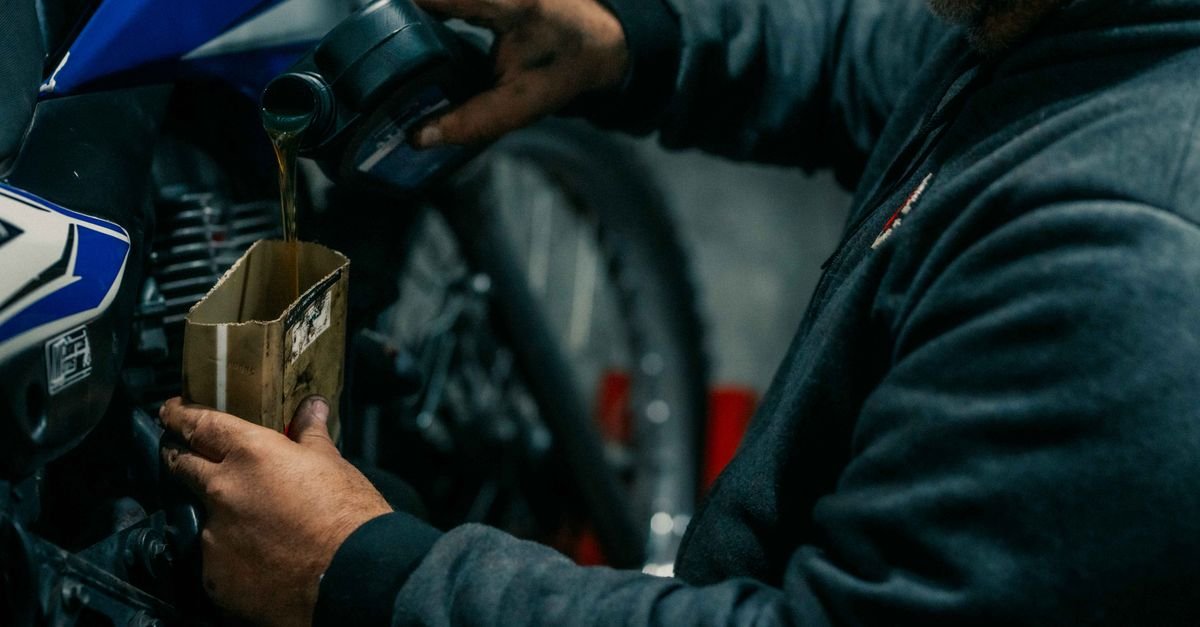
Used engine oil is acidic. Left in the crankcase for five months it etches the bearing surfaces. Change the engine oil before storage, not after. If your pump has a serviceable oil fill and dipstick, change the pump oil too — most homeowner pumps are sealed for life and have no fill, so check your manual rather than searching for a plug that does not exist.
Step 7: Push Pump Saver Fluid Through the Pump
This is the step that actually prevents freeze damage. Full instructions are in the pump saver section below.
Step 8: Protect the Outside
Wipe the machine down. Spray a light silicone or water-displacing lubricant on the quick-connect fittings, the trigger pivot and any exposed metal. Leave the nozzles out of their holder so the O-rings are not compressed all winter, and poke each orifice clear with the cleaning wire — debris left in a tip over the off-season hardens and is far harder to remove in spring.
Step 9: Store It Somewhere Dry and Above Freezing
Details in the storage section below. The short version: indoors, off the concrete, covered but not sealed in plastic.
Fuel Stabilizer vs. Running the Tank Dry
Both work. They fail in different ways, which is why manufacturers disagree. Here is the honest comparison.
| Factor | Fuel stabilizer in a full tank | Running the tank dry |
| Protects the carburetor bowl | Yes — treated fuel sits in it | Yes — nothing sits in it |
| Protects the tank from rust | Yes — full tank blocks condensation | No — bare metal tank can rust |
| Protects rubber fuel lines | Yes — lines stay wet and supple | No — lines can dry and crack |
| Effort at storage time | 2 minutes | 5–20 minutes of run time |
| Effort in spring | Add fresh fuel, start | Add fresh fuel, may need priming |
| Best for storage under 6 months | Best choice | Acceptable |
| Best for storage over 12 months | Fuel degrades even treated | Best choice |
| Plastic fuel tank | Either works | Fine, no rust risk |
| Metal fuel tank | Strongly preferred | Rust risk |
The rule that resolves it: for a normal 4–6 month winter, add stabilizer to fresh fuel, fill the tank about 95% full, then run the engine for two minutes so treated fuel reaches the carburetor. That last part is the step people skip, and it is the whole point — stabilizer sitting in the tank does nothing for the carburetor bowl.
If you are putting the machine away for a year or more, or you know you will forget about it, run it dry instead and shut the fuel valve.
How to Winterize a Pressure Washer Pump With Pump Saver Fluid
Pump saver is not just antifreeze. It is antifreeze plus lubricant plus corrosion inhibitor, and the lubricant is the reason it beats plain RV antifreeze. It conditions the seals and plungers so they do not dry out and shrink over the winter.
Applying It to a Gas Machine
1. Make sure the pump is drained and the water supply is off.
2. Screw the pump saver bottle onto the pump’s water inlet. Briggs recommends attaching it through a short section of garden hose so the bottle sits at a workable angle.
3. Open the bottle valve.
4. Pull the recoil starter slowly two or three times with the engine switch OFF. Do not start the engine.
5. Stop as soon as fluid comes out of the pump outlet. That means the passages are full.
Applying It to an Electric Machine
1. Attach the bottle to the water inlet the same way.
2. Open the valve and squeeze the bottle while you switch the motor on for one to two seconds only.
3. Stop the instant fluid appears at the outlet.
Never run an electric motor dry for more than a couple of seconds. The pump is water-lubricated and cooled, and running it dry burns seals fast.
How Much Fluid You Actually Need
| Machine type | Typical pump volume | Pump saver needed | How you know it worked |
| Electric, 1,300–2,000 PSI | 2–4 oz | 3–5 oz | Fluid at the outlet |
| Gas, 2,000–2,800 PSI | 4–6 oz | 5–8 oz | Fluid at the outlet |
| Gas, 3,000–4,000 PSI | 6–10 oz | 8–12 oz | Steady stream, no water |
| Hot-water or belt-drive unit | 10–20 oz | Full bottle plus coil flush | Fluid through coil |
A standard bottle treats one homeowner machine with fluid to spare. The test is visual, not measured: stop when what comes out the outlet is pure fluid and not cloudy water.
Antifreeze Flush for Severe Climates
If you live somewhere that stays below 20°F for weeks — the northern Midwest, the Prairies, northern New England — and the machine has to live in an unheated shed, go one step further and fill the whole water path, not just the pump.
- Use RV antifreeze (propylene glycol), never automotive antifreeze. Automotive coolant is ethylene glycol, which is toxic to pets and wildlife and illegal to dump.
- Pour antifreeze into a bucket, run a short hose from the bucket to the inlet, and cycle the machine until pink fluid exits the outlet.
- Reconnect the high-pressure hose and gun and push antifreeze through those too, so the hose and wand are protected as well.
- Label the machine so you remember to flush it in spring before the first use.
The obvious follow-up: can you use RV antifreeze *instead* of pump saver? Yes for freeze protection, no for seal conditioning. RV antifreeze stops ice but does not lubricate. If that is all you have, use it — it is far better than nothing.
How to Flush a Pressure Washer Pump Properly
Flushing is not only a winter job. A clean flush is what keeps the inlet valves free of grit, and grit in the valves is the most common cause of low pressure and of a machine that pumps no water at all.
Do a flush at these moments:
1. After every detergent use — two minutes of clean water on the soap setting.
2. After washing anything gritty, like concrete or a muddy driveway, where debris can be pulled through a damaged inlet screen.
3. Before winter storage, as Step 2 above.
4. After spring startup, to clear out pump saver residue.
Check the inlet screen every time. It is a small mesh filter in the water inlet, it costs almost nothing, and a torn one lets sand straight into the valves.
Electric vs. Gas: What Each One Needs
Electric owners skip most of this guide. Here is the split.
| Storage task | Electric machine | Gas machine |
| Flush pump with clean water | Yes | Yes |
| Release trigger pressure | Yes | Yes |
| Drain hose, gun, wand | Yes | Yes |
| Pump saver fluid | Yes | Yes |
| Fuel stabilizer or dry tank | Not applicable | Yes |
| Shut off fuel valve | Not applicable | Yes |
| Change engine oil | Not applicable | Yes |
| Remove spark plug and fog cylinder | Not applicable | Optional, long storage |
| Coil the power cord loosely | Yes | Not applicable |
| Check cord and GFCI plug for damage | Yes | Not applicable |
| Realistic time needed | 8–10 minutes | 20–30 minutes |
If you are still choosing between the two, the storage burden is a genuine factor — more on that in electric vs. gas pressure washers.
Where to Store It and What Temperature Matters
The target is simple: keep the pump above 32°F at all times. Everything else is a bonus.
| Location | Freeze risk | Verdict |
| Heated basement or utility room | None | Best. Gas machines only if fuel is drained and local codes allow |
| Attached garage, insulated | Very low | Excellent for gas machines |
| Attached garage, uninsulated | Low to moderate | Fine with pump saver installed |
| Detached garage or shed, unheated | High | Only with pump saver plus antifreeze flush |
| Outdoors under a tarp | Very high | Not acceptable |
| Vehicle or trailer | Very high | Pump must be fully winterized |
Three details that matter more than location:
- Get it off bare concrete. Concrete wicks moisture upward and rusts the frame. A scrap of plywood or a pallet fixes it.
- Cover it, but let it breathe. A sealed plastic bag traps condensation against the metal. A cotton drop cloth or a vented cover is better.
- Store gas machines away from any pilot light, water heater or furnace. Fuel vapor is heavier than air and travels along the floor.
Preventing Pump Damage the Rest of the Year
Freezing is the biggest single threat, but most pumps that die in July were killed by habits, not weather.
The Four Habits That Wear Pumps Out
1. Running dry. Even ten seconds without water can score the plungers. Always turn the water on first and squeeze the trigger to purge air before starting.
2. Sitting in bypass. When the trigger is released, water circulates inside the pump and heats up fast. Two minutes is usually the manufacturer limit. Beyond about five minutes the water can get hot enough to cook the seals — which is also a common reason a machine keeps shutting off.
3. Starving the inlet. A kinked hose, a small-diameter hose or a low-flow tap forces the pump to cavitate — pulling vapor bubbles that hammer the valve seats. Use a 5/8-inch hose no longer than 50 feet and open the tap fully.
4. Ignoring the inlet screen. A torn screen sends grit through the valves. Inspect it monthly during the season.
Hot Water Feeds Are a Trap
Most homeowner pumps are rated for inlet water up to about 100–104°F. Feeding hot water to save time softens the seals and shortens their life dramatically. Check the manual before you connect anything warmer than a garden tap.
De-Winterizing: The Spring Startup Checklist
Do not just connect a hose and pull the cord. Pump saver residue in the system will foam and can end up on the surface you are cleaning.
| Order | Task | Why it matters |
| 1 | Check pump and engine oil level and colour | Milky oil means moisture got in |
| 2 | Inspect hoses for cracks and kinks | Winter-set kinks burst under load |
| 3 | Replace or clean the inlet screen | Cheapest insurance on the machine |
| 4 | Connect water, open tap fully | Never start dry |
| 5 | Squeeze the trigger for 30–60 seconds, engine off | Purges air and flushes pump saver |
| 6 | Add fresh fuel; drain old fuel if untreated | Old fuel is the top no-start cause |
| 7 | Check the spark plug and air filter | Two minutes, prevents a hard start |
| 8 | Start and run at low pressure for 1 minute | Confirms steady flow before load |
| 9 | Test each nozzle on a scrap surface | Catches a clogged or worn tip |
If it will not start after all that, the fault is almost always fuel, spark or a stale carburetor — the troubleshooting order is laid out in pressure washer won’t start.

Five Mistakes That Undo the Whole Job
1. Adding stabilizer to old fuel. Stabilizer preserves good fuel; it does not repair fuel that has already gone bad.
2. Skipping the two-minute run after adding stabilizer. Untreated fuel stays in the carburetor bowl and gums it.
3. Storing with the trigger gun locked open. It holds the seals compressed and can drain the pump saver out.
4. Pouring pump saver in without cycling the pump. It has to be pushed through the passages. Poured in and left, it just sits at the inlet.
5. Assuming a garage is warm enough. An uninsulated attached garage in a northern winter regularly drops below freezing.
FAQ
At what temperature does a pressure washer pump freeze?
Water in the pump can begin freezing once the surrounding air holds below about 32°F for several hours. Real damage usually needs a sustained spell in the 20s. Because the pump is metal and holds only a few ounces of water, it cools fast — treat any forecast below freezing as a risk.
Can I skip pump saver if I drain the pump completely?
You cannot drain it completely. Narrow internal passages hold water by surface tension no matter how long you tip the machine. Draining plus indoor storage above freezing is acceptable; draining plus an unheated shed is not.
Is RV antifreeze the same as pump saver fluid?
They overlap but are not identical. RV antifreeze prevents ice. Pump saver prevents ice and lubricates the seals and plungers and inhibits corrosion. Use RV antifreeze if it is what you have, but pump saver is the better product for the job.
Do electric pressure washers need winterizing?
Yes. The pump is the vulnerable part, and electric machines have pumps too — often smaller ones with tighter passages. You skip every fuel step, but the flush, drain and pump saver steps are identical.
Can I use automotive antifreeze instead?
No. Automotive coolant is ethylene glycol, which is toxic and cannot be discharged onto your lawn or into a storm drain in spring. Use propylene glycol RV antifreeze or a purpose-made pump saver instead.
Should I store the pressure washer with fuel in it or empty?
For a normal winter, store it with fresh stabilized fuel and a nearly full tank — that keeps condensation out and the fuel lines supple. For storage beyond a year, run it dry and close the fuel valve.
How long does pump saver protection last?
A properly filled pump stays protected through one storage season, roughly six months. If the machine sits for over a year, re-apply pump saver annually so the seals do not dry out.
What if I already stored it without winterizing?
Bring it somewhere warm and let it thaw fully for 24 hours before touching the starter. Never force a frozen pump. Once thawed, connect water and check for leaks under low pressure before applying full load.
Do I need to change the pump oil every year?
Only if your pump has a fill plug and dipstick, which mostly means axial and triplex pumps on larger machines. Many homeowner pumps are permanently sealed. Check the manual instead of hunting for a plug that may not exist.
Can I leave hoses connected over winter?
No. Water trapped in a coiled hose freezes, expands and weakens the inner liner, and the quick-connect O-rings stay compressed for months. Disconnect, drain and store hoses loosely coiled indoors.
Fifteen Minutes Against the Price of a Pump
Knowing how to winterize a pressure washer is the highest-value fifteen minutes you will ever spend on the machine. Flush the pump with clean water, bleed the trapped pressure through the trigger, drain the hose, gun and wand, then push pump saver fluid through the inlet until it runs clean out the outlet. Gas owners add stabilizer to fresh fuel, run it two minutes, change the oil and shut the fuel valve.
Then store it dry, off the concrete and above freezing. That is the whole job. A pump replacement costs a large fraction of a new machine and a cracked housing usually ends it entirely — both are completely preventable failures. Do it once each autumn, follow the spring checklist in April, and the same machine will still be running a decade from now.
Verified sources: Briggs & Stratton — Winterize and Store Your Pressure Washer · Hotsy — Winterizing Your Pressure Washer