Last Updated on September 24, 2026 by Umar Farooq
Cleaning siding with bleach works, but a wall is not a driveway stood on its end — gravity decides the dwell rather than your watch, which is why a vertical surface wants a weaker mix than a slab, applied wet and re-wetted, never applied strong and rushed.
Almost everything written on this subject is a dilution ratio and a reminder to wear gloves. Both are fine as far as they go. Neither touches the thing that actually makes a wall different from every other surface you will ever point a sprayer at, which is that the wall does not keep what you give it. The instant your solution lands, it starts leaving. Where it goes is downhill: into the laps, across the trim, over the window wraps, and onto whatever metal happens to be standing on the ground at the bottom of the elevation.
This article is about chlorine bleach on its own — what it does to a vertical surface and to the things bolted to one. If what you want is mixing by jug strength, the sodium hypochlorite mix ratios are laid out separately, because the chemistry does not change with the angle of the surface. The behaviour very much does.
Cleaning Siding With Bleach: The Dwell Is Decided by Gravity
On a slab you set the dwell yourself. Flood the concrete and the concrete keeps what you gave it, in place, for as long as the sun allows. Ten minutes of contact time means ten minutes of contact time, and you can walk away in the middle of it and check your phone.
A wall does none of that. Surface tension holds a thin film against the face of the panel for a while, then the film gives up and travels. So the contact time on a vertical surface is never a number you chose — it is a number the liquid granted you, and it varies with sun, with how chalky the panel is, and with whether you are looking at a smooth modern extrusion or a rough painted board that holds a film like blotting paper.
Hypochlorite is a contact-time chemical. It has to sit on the colony, wet, while it oxidises the pigment. Dry is not weak. Dry is stopped. A patch that dried out two minutes in looks exactly like a patch that had eight, right up until the point three weeks later when the algae comes back to it first and draws you a map of where you went wrong.
Here is where nearly everyone goes astray. Faced with a mix that keeps running off, the instinct is to make it stronger, because strength feels like the variable under your control. It is the wrong lever. There are two ways to raise the total dose a colony receives: raise the concentration, or apply it again. The second is free, takes fifteen seconds, and costs your plants, your fascia and your window screens nothing. The first costs all three, every time, and the growth barely notices. Re-wetting mid-dwell is not an admission that the first pass failed. It is the technique.
The Bottom Course Gets Every Dose You Applied Above It
This is the argument for a weaker mix on a wall, and it has nothing to do with vinyl being more delicate than concrete. It is arithmetic.
Spray a driveway and every square foot receives one dose. Spray a two-storey elevation and the top course receives one dose, and the bottom course receives its own dose plus the drainage of every square foot above it. Twenty feet of wall does not drain into twenty feet of ground. It drains into a band about three feet high, the trim below it, the foundation, and whatever is planted in front. The bottom of a wall is not a surface being cleaned. It is a collection point.
So the useful question is never “how strong should the mix be.” It is “how strong will this be by the time it reaches the bottom course.” A mix that is sensible at the gable is doing something else entirely at ankle height.
People overestimate how well they mix, too, and there is at least one published number on that. A review of sodium hypochlorite case reports records that in surveyed households making up their own disinfectant solution at home, 74.2% used a wrong proportion of sodium hypochlorite, and approximately 42% experienced at least one side effect (PMC9058106). That survey measured kitchen disinfectant during the COVID period, not house washing, so do not read it as a siding statistic. Read it as what it is: evidence that self-mixing is a skill almost everyone believes they have.
Which brings me to the one opinion I will push on this topic. Mix for the bottom course, not the top. If you are hesitating between two strengths, take the weaker one and plan on two passes. Two weak passes put the same total chlorine on the growth and a fraction of it into the collection point at the bottom, because most of the first pass has already broken down and rinsed by the time the second one arrives. One strong pass puts everything into that band at once. The wall cannot tell the difference. The border underneath it can.
What the Laps Are Holding After You Move the Ladder
Siding is built loose on purpose, and that single design decision is why a wall behaves differently from any other surface you will clean.
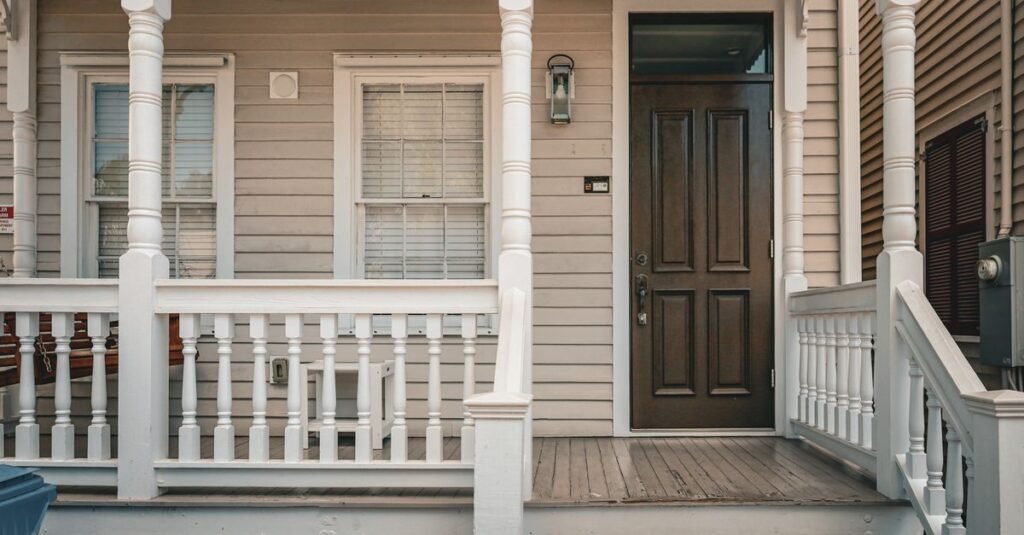
The polymeric siding trade body is blunt about both halves of it. Panels “must move freely from side to side,” and installers are told to leave “approximately 1/32″ (0.8mm) (about the thickness of a dime) clearance between the fastener head and the siding panel.” The cladding itself is “not a water-resistive barrier” — that job belongs to the house wrap behind it (PEPA, Installation Best Practices). A wall that is deliberately hung slack, with a dime’s gap under every nail head, is a wall full of narrow horizontal slots that a thin liquid will find without being asked.
So the lap is not a joint. It is a reservoir. Solution running down the face arrives at the top of each course, a share of it ducks under the overlap by capillary action, and it sits in there in the dark with no air moving across it. The same thing happens at every butt joint, in the J-channel around windows and doors, inside corner posts, and along the bottom lock of the starter strip. None of those spaces are reached by a rinse that runs down the outside of the wall, because the rinse water takes the same path the rain takes and travels over the top of them.
What comes out later is worse than what went in. Water evaporates out of a lap much faster than the salts dissolved in it do, so the film left behind concentrates while it waits. When it finally releases — twenty minutes later, the next time the wall warms and the panel expands — it exits stronger than anything you mixed, onto a wall you have already rinsed and are already pleased with.
The fix is unglamorous and takes four minutes. Rinse the bottom third of the elevation for considerably longer than feels sensible, flood the J-channel and the corner posts rather than passing over them, and then go and do something else for twenty minutes and come back and rinse the butt joints and the bottom two courses again. That second visit is the one that separates a wall that stays clean from a wall that develops opinions overnight.
The Streaks Arrive an Hour After You Pack Away
There are two kinds of streaking on a washed wall, and only one of them is a technique problem. The stripes you get from uneven application show up while you are working and can be fixed by overlapping properly. The ones in this section show up after the hose is coiled, and no amount of care with the fan pattern prevents them.

The first is the late drip out of the laps. It lands on a wall that is now clean, dry and warm, so instead of blending into a wet surface it sits as a narrow, concentrated rivulet and dries there. That reads as a faint bright line running from a butt joint to the ground, most visible on older sun-faded panels where the surrounding surface has nothing left to give up. You will not see it on the day. You will see it on the second sunny morning, from the pavement, and assume you missed a bit.
The second is what those runs cross on the way down. Everything below the siding is downstream: the foundation course, the painted steps, the stained deck boards that butt into the wall, a dark door, the top rail of a fence that meets the house. A chlorine run that dries on a stained board leaves a pale track along exactly the line it took — not a cosmetic annoyance you can rinse out next week, but bleached timber that needs sanding or re-staining.
Neither problem needs a product. Both need the same habit: treat the ground and the surfaces below the wall as part of the job, wet them before you start so a run lands on something already saturated, and do a final rinse of the whole elevation and everything under it after the wall itself has stopped dripping. The moment you decide you are finished is about half an hour before you actually are.
Trim, Screens and the Condenser Standing Right Underneath
A wall is the only surface on the property with hardware bolted to it, and most of that hardware is thin aluminium.
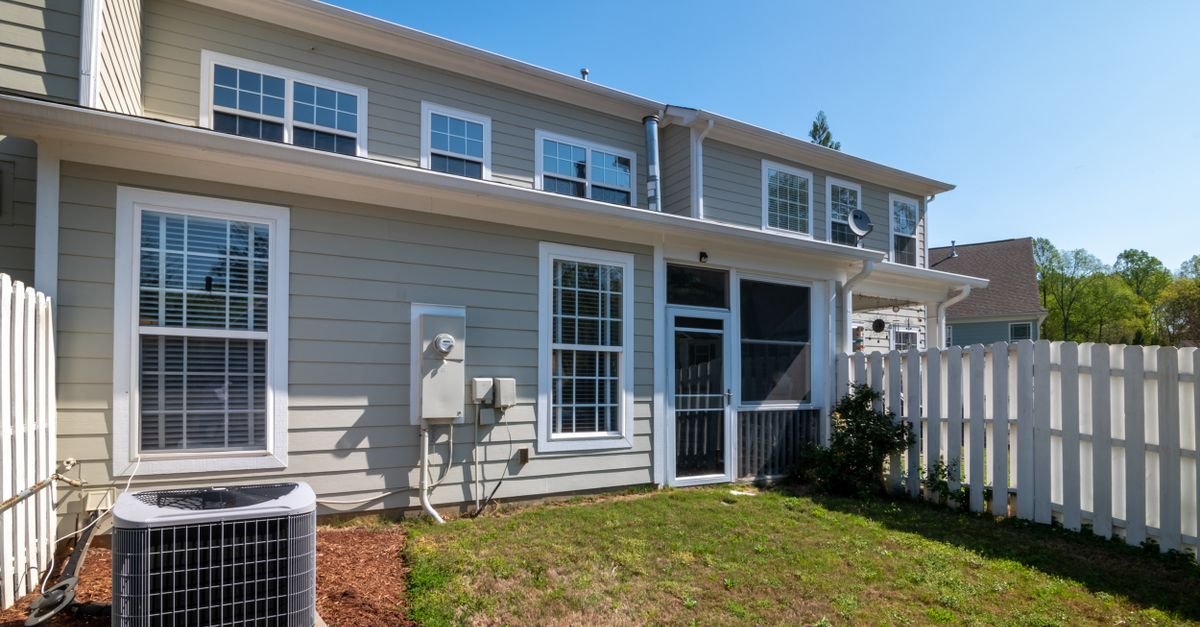
Count what your solution is going to cross. Coil-stock wrapping on the fascia and window casings, which is painted aluminium about as thick as a drinks can. Soffit panels with ventilation slots running the length of the eave. Anodised window frames. Light fixtures, house numbers, letterboxes. And the insect screens, which are the thinnest metal anywhere on a house and sit in a frame that traps liquid along its bottom rail.
Then look at the ground. A condenser unit with aluminium fins a fraction of a millimetre thick, standing against the wall, with a fan drawing air — and anything airborne — straight through it. A galvanised meter box. A hose bib. Deck fasteners. Patio furniture. The mower nobody moved.
The mechanism is not the alkalinity, it is the chloride that comes with it. Aluminium and galvanised steel survive outdoors because they carry a thin passive oxide film, and the chloride ion is the classic breaker of that film. Rain is not a problem for any of it. Repeated exposure to a concentrated chloride solution that pools in a screen frame or a soffit slot and then dries there is a different proposition.
None of this argues against washing the wall. It argues for four things that cost nothing: take the screens out and wash them flat on the grass, where they get rinsed properly instead of holding a puddle in the frame; put a bin liner or a sheet over the condenser and remember to take it off; rinse the fascia and the window wraps from above rather than assuming the wall rinse got them; and move the furniture. If the machine is coming out as well as the bucket, the pressure limits for each cladding material are in power washing siding, and they matter more on trim than on the panels.
A Side Yard Is the Most Enclosed Space on This Job
The dirtiest wall on the house is almost always the shaded one, and on a lot of properties the shaded one faces the neighbour across a gap of about six feet. That is where the mildew is, so that is where the bleach goes — in the narrowest, stillest, least ventilated corner of the property, with a hard reflective surface on both sides and no wind to speak of.
Now consider what else lives on a wall. Hard-water remover for the windows. Oxalic acid brightener for the deck that butts into the siding. Rust remover for the railing. Masonry cleaner for the foundation course. Ammoniated glass cleaner on the very panes you are about to spray past. Every one of those is either an acid or an ammonia product, and ATSDR states it plainly: sodium hypochlorite “releases chlorine gas when it comes in contact with acids” (ATSDR, Medical Management Guidelines for Chlorine).
The bucket is the obvious place they meet, and it is not the common one. The common one is sequence. An acid brightener used on the deck an hour ago is still in the boards where they meet the wall. A rust remover is still in the crack under the railing post. A pump sprayer that had an oxalic mix in it last autumn still has residue in the wand and the dip tube, because nobody flushes a sprayer they are putting away. One product per day, one product per sprayer, flush both in between — and do the side-yard elevation on a day with some air moving, rather than the still, warm, perfect-looking afternoon that feels like the right one.
Wear eye protection for this part specifically. The same case-report review that recorded the mixing figure lists what a splash does to an eye, and the list runs from conjunctivitis through corneal abrasions. A wall sprayed at head height between two hard surfaces sends a certain amount straight back at you, which is a good reason to treat the side yard as the section where the safety glasses are not optional.
FAQ
Will bleach damage vinyl siding?
Diluted, applied wet and rinsed properly, no. Undiluted, yes — it appears on the polymeric siding trade body’s list of products that damage siding, alongside solvents and nail polish remover. The damage in practice is rarely a hole in a panel; it is bleached stain on the deck boards below, dulled window wraps and screens that have gone brittle at the bottom rail.
What is the right ratio for cleaning siding with bleach?
It depends entirely on what strength jug you bought, which is why a single ratio is useless advice. Aim to land near 1% sodium hypochlorite at the wall and work back from the label — the full table by jug strength is in the sodium hypochlorite article. On a vertical surface, take the weaker end of whatever range you are considering.
Do I have to rinse bleach off siding?
Yes, and for longer at the bottom than at the top. The face of the panel rinses easily. The laps, butt joints, J-channel and corner posts hold solution that a downward rinse passes straight over. Rinse, wait twenty minutes, and rinse the bottom two courses again.
Why did my siding streak after it had dried?
Almost always a late release from the laps. Solution that wicked under an overlap sits there, concentrates as the water evaporates, and then drains out onto a wall you have already cleaned and dried. It dries as a narrow bright line, usually running from a butt joint downward, and it becomes visible a day or two after the job.
Can I clean siding with bleach without a pressure washer?
Yes, and for a single-storey wall it is often the better choice. A pump sprayer or a hose-end applicator puts the chemistry on, and a garden hose rinses it off. Bleach does the killing; pressure only moves what is already dead. If the growth is specifically mould rather than algae, the material-by-material detail is in how to remove mold from vinyl siding.
How often should a wall get bleached?
Only when there is something living on it, which for most houses is not every year. A wall that is merely dirty wants a surfactant and a rinse, and running chlorine over it achieves nothing except a chloride dose for the trim and the beds. Pick a mild, overcast day when you do go: sun shortens the only thing keeping the chemistry alive.
Mix for the Bottom Course, Not the Top
Every difficult thing about this job comes from the same fact: a wall gives your solution somewhere to go, and it goes there whether or not you have finished with it. That is what sets the dwell, what fills the laps, what streaks the wall an hour after you have put the sprayer away, and what decides the mix.
So pick the strength that the bottom three feet of the wall can live with, apply it twice if once is not enough, and give the last twenty minutes of the afternoon to a rinse you think is unnecessary. If you are already looking at a wall that has dried with a set of pale lines you did not put there — go and wet it, top to bottom, including the ground. It is very often just the laps, finishing the job on their own schedule.