Last Updated on September 25, 2026 by Umar Farooq
A pressure washer fuel leaking anywhere on the machine is a stop-work fault, not a weekend job: shut the fuel tap, leave the engine off, and do not pull the cord again until you know where the petrol is getting out. Almost every other fault on this site can wait until Saturday. This one sits a few inches from an exhaust that runs hot enough to matter, and the order of operations is not negotiable.
That is the safety message, at the top on purpose. The rest of this page is the diagnosis: the seven places petrol actually escapes on a gravity-fed small engine, and how to tell which one is yours from where the drip lands. Everything here assumes a gas engine with a float-bowl carburetor — an electric machine has no fuel system, so a puddle under one is water or pump oil. And a machine that floods, backfires or will only run with the choke closed has a fuel *delivery* fault rather than a fuel *containment* fault, which is a different family and a different page.
Shut the Fuel Tap and Walk Away Before You Touch Anything
Do these five things in this order, and do them before you start looking for the cause.
1. Shut the fuel tap. On most machines it is a small lever at the carburetor inlet or in the line below the tank. Turn it to OFF. On a gravity-feed system this removes the head of fuel that is pushing the leak.
2. Do not start the engine. Not to “see where it is coming from,” not briefly. Kohler’s own service manual puts the reason in one line: spilled fuel could ignite if it comes in contact with hot parts or sparks from ignition (Kohler SH255, SH265, SH270 Service Manual).
3. Pull the spark plug lead and tuck it away from the plug. A recoil pull with the lead on makes a spark whether you meant to or not.
4. Move the machine outdoors and away from ignition sources, which includes more than you think: a boiler pilot light, a garage fridge compressor, a light switch, a phone charger, a trouble lamp with a switch on the cable.
5. Let it dry, and absorb what is on the floor. Cat litter or a proper absorbent granule, swept up and disposed of through your local hazardous waste route. Not down a drain, not into a wheelie bin, not hosed off the driveway.
The fourth point matters more than it sounds, because the puddle is not the hazard. The vapour above it is. NOAA’s CAMEO Chemicals entry for gasoline records a flash point of −36 °F and states that vapor “is heavier than air and may travel considerable distance to a source of ignition and flash back” (CAMEO Chemicals, Gasoline). A flash point that far below zero means there is no ambient temperature at which petrol stops producing ignitable vapour, and heavier-than-air means that vapour does not rise and disperse — it runs along the floor, looking for something with a spark in it.
Wait until the smell has genuinely gone before you do anything that makes a spark. I am not going to publish a number of minutes for that, because it depends on how much spilled, how warm it is and how much air is moving, and a made-up figure would be worse than none.
Petrol, Pump Oil or Water: Read the Puddle First
Three fluids live inside a pressure washer and all three can end up on the floor. They look more alike on concrete than they do in a bottle, and people spend whole afternoons rebuilding a carburetor that was never leaking.
| Clue | Petrol | Pump or engine oil | Water |
| Smell | Unmistakable, and the fastest test there is | Faintly oily, or nothing | Nothing |
| On clean cardboard | Spreads wide, evaporates within minutes, leaves a faint ring | Stays put, stays wet, darkens the board permanently | Dries with no residue |
| Colour | Clear to pale straw, sometimes pale blue or pink from dye | Amber through to grey-brown; milky if contaminated | Clear |
| Where it drips from | The carburetor, the tap, the line, the tank underside | The pump underside, the engine sump, around a seal | The pump head, fittings, the inlet |
| When it appears | Often only after standing with the tap open | During or shortly after a run | While the water supply is connected |
The cardboard test is worth the thirty seconds. Slide a clean sheet under the machine with the fuel tap shut and leave it an hour. Nothing on it means the leak needs the tap open to happen, which already puts you in the fuel tap, the line or the carburetor. Something on it with the tap shut means gravity alone is doing it, which points at the tank, the grommet or the seam.
Where a Pressure Washer Fuel Leak Starts, Tank to Carburetor Bowl
A pressure washer fuel leaking from somewhere unhelpfully vague is easier to pin down once you know the system is gravity-fed and therefore permanently pressurised by height. The tank sits above the carburetor, so with the tap open every joint between the two is holding back a column of petrol whether the engine runs or not. That single fact explains why so many of these leaks only show up after the machine has stood for a day. Working downhill, here is the whole fuel path and what fails at each point.
| Where | What actually fails | When you see it |
| Fuel cap | Vent, or a swollen rim gasket | After a run, or after standing in sun |
| Tank seam or grommet | Moulding split, or a hardened rubber bush | Worst with a full tank, stops as it empties |
| Fuel tap | Shaft packing, or the sediment cup O-ring | Only with the tap ON, rate unchanged by running |
| Fuel line | Hardened, cracked at the barbs, or weeping through the wall | Tap ON, often worse when warm |
| Inline filter | Cracked housing or split barb | Tap ON, drip lands directly below the filter |
| Float needle | Not seating, so the bowl overflows | After standing with the tap ON |
| Bowl gasket or O-ring | Shrunk and hardened | Steady weep from the lowest point of the bowl |
Seven places, and they are not equally likely. The float needle accounts for more of these than everything below it put together, which is why it gets the next section rather than a bullet point.
The Float Needle That Stopped Shutting Off
Kohler puts the mechanism better than most paraphrases of it: fuel level in the bowl is maintained by the float and fuel inlet needle, the buoyant force of the float stops fuel flow when the engine is at rest, and as fuel is consumed the float drops and fuel pressure pushes the needle off its seat to let more in. It is a toilet cistern with an engine bolted to it.
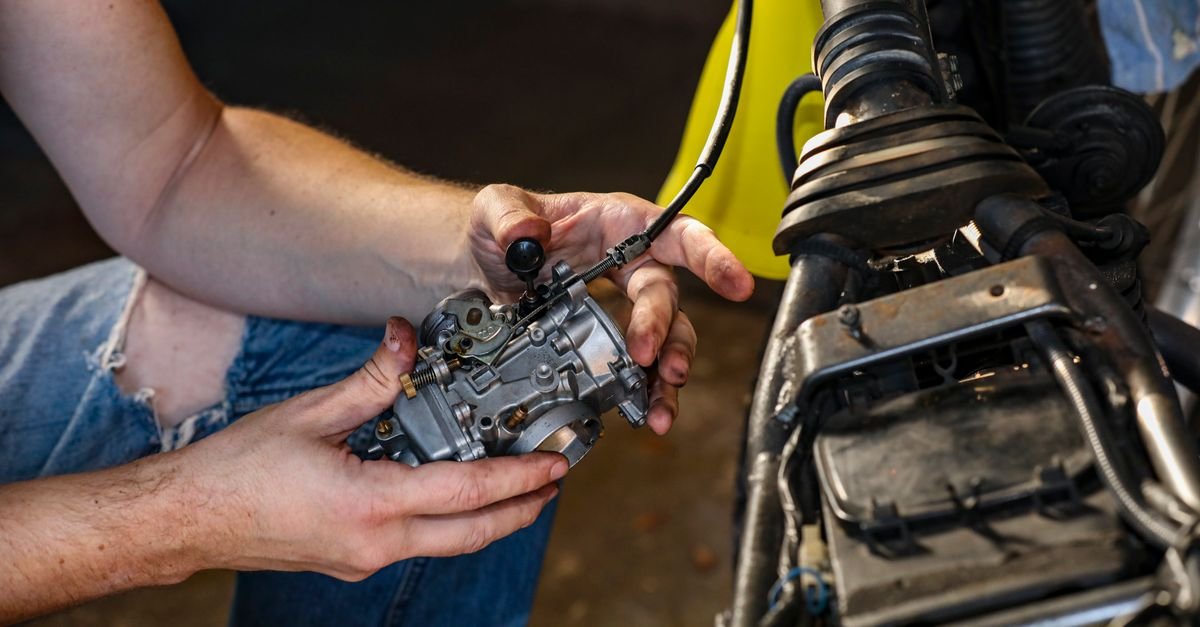
Now take away the shut-off. A speck of grit under the needle, a varnish film on the seat, a rubber needle tip that has worn a permanent ring where it sat for three seasons, or a float that has cracked and filled with fuel — any of those and the needle stops closing. The bowl fills past its design level, and where the surplus goes is the tell:
- Up the main jet tower and out into the throat, where it runs backwards through the venturi and drips out of the air filter housing. Petrol soaking the air filter element, or a wet patch on the backplate, is this fault almost every time.
- Out of the bowl vent or the overflow, straight onto the floor under the carburetor.
- Into the engine, which is the version covered further down.
The signature is that it leaks *while standing*, not while running: a running engine consumes fuel fast enough to keep the level down, and a standing one does not. Kohler’s troubleshooting table lists the causes under the single condition “Fuel leaks from carburetor”: bowl vent or air bleeds plugged, a leaky or cracked float, an intake air leak, plugged idle holes or dirt in the fuel delivery channels, dirt under the fuel inlet needle, and a leaking bowl gasket. Note how many of those are dirt rather than wear. This is rarely a worn-out part.
What to do, in order:
1. Shut the tap and tap the carburetor body gently with a screwdriver handle. Sometimes the needle is stuck and reseats. That is a diagnosis, not a repair — if it works, the seat is dirty and will do it again.
2. Drop the bowl with a container underneath and look at what comes out. Grit means the tank screen has failed; brown syrup means varnish.
3. Pull the float pin, the float and the needle. Kohler’s remedy for dirt under the inlet needle is exactly what you would hope: remove the needle, clean needle and seat, blow through with compressed air.
4. Submerge the float in a jar of water and watch for bubbles, the manual’s own test for a cracked float. A float with fuel inside it is finished.
5. Check the bowl vent is clear, because a plugged vent is on that list in its own right.
If the varnish is beyond a wipe and a blast of air, the full strip and clean is laid out step by step in pressure washer carburetor cleaning. What I would not do is adopt the habit of shutting the fuel tap every time as a permanent answer. That is not a fix. It is a routine you will forget once.
Why the Bowl Seal Weeps After a Season in the Shed
This is the leak that appears out of nowhere, and the one people most often create themselves by taking the bowl off for an unrelated reason and putting it straight back on.
The bowl is sealed by a rubber gasket or an O-ring, usually nitrile. Oak Ridge National Laboratory soaked nitrile, neoprene and five other elastomers in test fuels including ethanol blends for four weeks, then dried them and measured again. Everything swelled and softened while wet; on drying, the nitriles and neoprene shrank and embrittled as their plasticisers were extracted. So the seal on your bench has spent years swollen and compliant, and the moment it dries out it becomes a smaller, harder ring being asked to fill a groove it no longer fits.
That gives a symptom with a specific shape: a slow, steady weep from the lowest point of the bowl or along the bowl seam, present whenever the tap is open, unchanged by whether the engine runs. Kohler’s fix is two words long — replace gasket — and that is genuinely the whole answer.
Two things not to do. Do not tighten the bowl nut harder; it threads into aluminium and seals against a gasket, not against force, and the step past a crushed gasket is a stripped casting. And do not stretch an O-ring into its groove, because stretching thins the section and a thinner ring seals worse than the tired one you took off. Buy the gasket kit before you open anything, on the reasonable assumption that a seal which has been wet since the factory will not enjoy an afternoon in fresh air.
The Fuel Tap Drips From Its Shaft, Not Its Joint
Fuel taps come in two shapes and leak in two different places, which is why “my fuel valve is leaking” produces such confused advice.
The in-line tap is a small plastic or brass body spliced into the fuel hose with a lever on top. It weeps around the lever shaft, where a tiny O-ring or a packing washer does all the work. It is not meaningfully repairable, and the whole tap costs less than the fuel in the tank.
The integrated tap sits at the carburetor inlet and usually carries a sediment cup below it, catching water and grit before either reaches the needle. That cup seals on an O-ring, and Kohler publishes the routine: stop the engine, turn the lever to OFF, remove the cup, clean it with solvent and wipe it dry, inspect the O-ring and replace as necessary, refit finger tight and then a further half to three-quarters turn with a wrench, then turn the lever ON and check for leaks. The manual adds the line that tells you how common this is: if the cup still leaks, do it again.
The diagnostic that separates a tap leak from everything downstream is the rate. A tap weeping at its shaft drips at the same speed whether the engine is running, idling or off, because the head of fuel above it never changes. A carburetor leak almost always changes with running.
Perished Lines and the Clamps Nobody Replaces
Fuel line does not fail in a way you can see. It hardens from the inside out, loses its grip on the barbs it has been stretched over for years, and cracks at exactly the point where a torch beam does not reach.
There is a published replacement interval for this and virtually nobody follows it. Kohler’s maintenance schedule lists, under Fuel System: every 200 hours, replace fuel line. Not inspect. Replace. I went looking for a competing figure from another maker and mostly found “inspect annually,” which is weaker advice for the same part. The clock that matters is the calendar rather than the hour meter, because the hardening happens whether the engine runs or not.
Three places to look, with the tap shut and a torch:
- At the barbs. Squeeze the hose either side of each fitting. A healthy line is springy. One that feels like a piece of plastic tube has already failed and is being held together by the clamp.
- Wherever the line passes near the exhaust shield. Heat ages a short section far faster than the rest, and this is where a hairline split usually appears.
- The inline filter, if fitted. The plastic housings crack across the seam and the barbs split lengthwise, and the drip lands directly below so the source is easy to miss.
Then the clamps. Most machines leave the factory with spring clamps or crimped wire clips, and almost everybody refits the old one onto the new hose. A spring clamp is sized for a particular wall thickness and elasticity and has been sitting compressed for years. Replace them. Fit a worm-drive clamp instead and do it up snug, then stop — over-tightening one into soft fuel hose cuts a groove that becomes the next leak.
Here is the opinion, and most parts counters will not offer it: do not put generic hardware-store rubber hose on a small engine fuel system. It will pass fuel, it will not drip, and it will still leak — through the wall, as vapour. Nonroad engines are certified against a permeation standard, and the EPA’s numbers are specific: 15 g/m² per day for standard nonroad fuel lines, 10 g/m² per day for low-emission lines, 225 g/m² per day for cold-weather lines (EPA, Nonroad Small Spark-Ignited Engines and Evaporative Components). Kohler states it from the other side: low permeation fuel line must be installed on its carbureted engines to maintain EPA and CARB compliance. Uncertified hose meets none of those figures, which is why a machine with the wrong line smells of petrol in a closed shed while showing you a dry floor. Buy the line by specification, not by internal diameter alone.
A Split Plastic Tank Is a Tank Job, Not a Sealant Job
Tank leaks are less common than carburetor leaks and considerably more annoying, because there is very little you can honestly do about them.
The two failure points are the moulded seam, where a blow-moulded polyethylene tank is thinnest, and the grommet where the outlet fitting passes through the tank wall. The grommet is rubber, it has sat in ethanol-blend fuel for years, and it shrinks and hardens on exactly the mechanism above. Then it weeps at the bottom of the tank.
That gives you a free diagnostic. A leak that is worst with a full tank and stops as the level drops is at or below the fuel level — grommet, seam or outlet. A leak that persists at any level is above it, which means the cap or the filler neck. Dry the tank area thoroughly, dust it with chalk or talc, fill up, and watch where the powder darkens first.
On repairs I will be blunt, because the internet is not. Polyethylene has low surface energy, which is the materials way of saying nothing sticks to it, and that is precisely why fuel tanks are made of it. Epoxy, tank sealant and the putty sticks sold for this job bond to the surface film rather than the plastic, while holding back a liquid that spends all day trying to get underneath them. Plastic welding is the trade answer; a new tank is the realistic one. On a metal tank there is one rule worth publishing: never apply heat, a torch or a welder to a tank that has held fuel, because the empty space above the fuel is the dangerous part and rinsing does not make it safe.
Fuel Pushed Out of the Cap on a Hot Afternoon
The cap is the one leak that arrives on a warm day and vanishes on a cool one, which makes it look like an intermittent fault rather than a physics lesson.
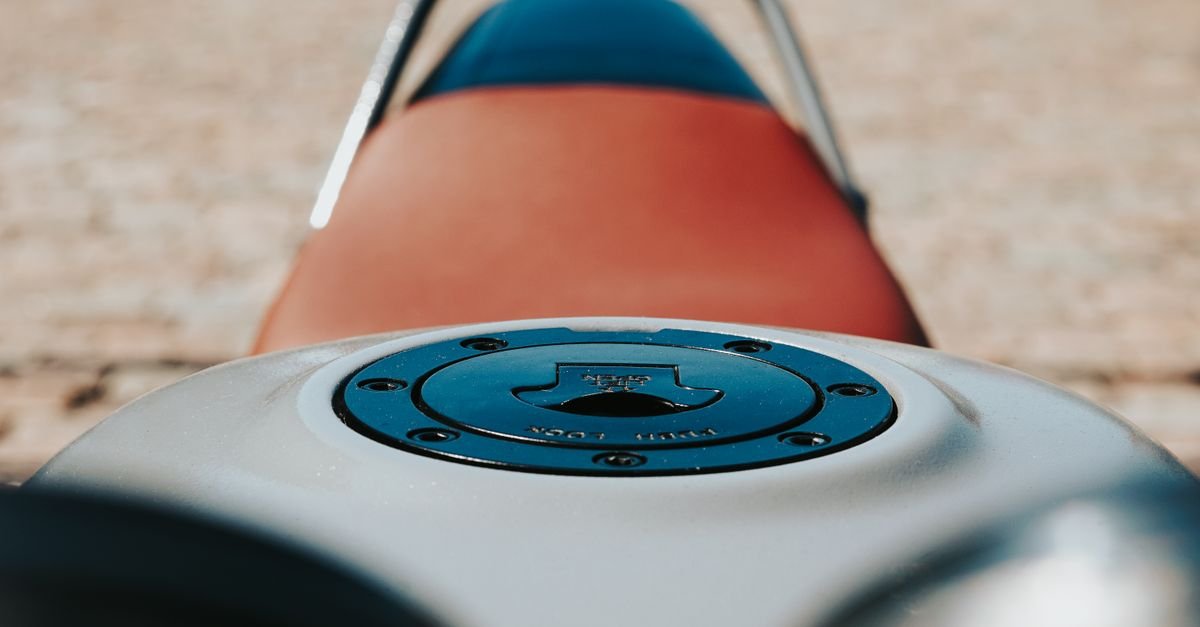
Petrol expands as it warms. Fill to the top of the filler neck in a cool garage, wheel the machine into the sun or run it for twenty minutes, and the fuel has nowhere to go but out — past the cap gasket, down the side of the tank, onto the frame. The instruction to fill only to the bottom of the filler neck is not manufacturer caution. It is leaving room for the fuel to get bigger.
Three cap-related leaks worth separating:
- Overfilling, as above. Fixed by not doing it.
- A perished rim gasket, which shows as a wet ring around the cap and a petrol smell strongest at the top of the machine. Caps are cheap and a cracked one is not worth saving.
- Tipping. Laying a machine on its side to fit it in a car boot puts the tank vent below the fuel level, and fuel comes out of the vent, the carburetor or both. If yours has just been transported, that is almost certainly the whole story.
A blocked vent does the opposite and starves the engine rather than leaking, which is a stalling symptom rather than a leak, so it lives on a different page.
The Leak That Ends Up in the Crankcase
This one deserves naming because it produces no puddle at all, so people do not think of it as a leak. Same stuck float needle, different route: with the tap open and the machine standing, fuel overflows the bowl into the throat, and if the intake valve is off its seat it runs down the bore, past the rings and into the sump. Nothing hits the floor. The oil level rises instead.
The tells are a dipstick reading above full when you have added nothing, oil that is thinner and paler than it should be, and a dipstick that smells of petrol rather than oil. The low oil shutdown will not save you here — it watches level, and the level is fine, which is discussed properly in pressure washer low oil shutdown. Diluted oil loses film strength, and a splash-lubricated small engine has no reserve to fall back on.
Do not start it. Change the oil, fix the needle, change the oil again after a short run. The full version of what contaminated crankcase oil does and how quickly is in pressure washer water in oil, which covers fuel dilution alongside water.
FAQ
Why is my pressure washer leaking gas?
By a wide margin, a carburetor float needle that is no longer seating, which lets the bowl overflow into the throat and out through the air filter housing or the bowl vent. After that, in rough order: a hardened bowl gasket or O-ring, a weeping fuel tap, perished fuel line at the barbs, a cracked inline filter, a failed tank grommet, and an overfilled or badly sealing fuel cap.
Is it safe to use a pressure washer that is leaking fuel?
No. Shut the fuel tap, leave the engine off and move the machine away from anything that could ignite. Petrol has a flash point of −36 °F, so it makes ignitable vapour at any temperature you will ever work in, and that vapour is heavier than air and travels along the floor to find an ignition source. Starting the engine to locate the leak is the specific thing not to do.
Why is gas leaking out of the air filter on my pressure washer?
Because the carburetor bowl is overflowing. Fuel passing a float needle that will not close rises above the bowl’s design level, comes up the main jet tower into the throat, and runs backwards out of the intake into the air filter housing. A petrol-soaked filter element is close to a diagnosis on its own. Shut the tap, drop the bowl, clean the needle and its seat.
Why does my pressure washer leak gas only when it is sitting?
Because a running engine consumes fuel fast enough to keep the bowl level down, and a standing one does not. With the tap open and nothing drawing, a needle that will not shut off fills the bowl until it spills. Dry all afternoon, puddle by morning, is a float needle almost every time.
Can a stuck carburetor float be freed without taking the carburetor off?
Sometimes. Shut the fuel tap and tap the carburetor body gently with a screwdriver handle; a needle held off its seat by a speck of grit will occasionally reseat. Treat that as information rather than a repair, because the seat is dirty and it will do it again. The proper fix is dropping the bowl and cleaning the needle and seat.
How do I stop a pressure washer fuel tap from dripping?
An in-line tap weeping around its lever shaft is a sealed assembly — replace it, it costs very little. On a tap with a sediment cup at the carburetor inlet, the leak is almost always the cup O-ring: shut the lever, remove the cup, clean it with solvent, replace the O-ring, refit finger tight then half to three-quarters of a turn with a wrench, and check again with the lever open.
Can I use ordinary rubber hose for a pressure washer fuel line?
Not if you want it to stay sealed. Nonroad small engine fuel lines are certified against permeation limits — 15 grams per square metre per day for standard lines, 10 for low-emission lines — and uncertified hose meets none of them. It will not drip, but it passes fuel through its wall as vapour, which is why a machine with the wrong line smells strongly of petrol in a closed shed while the floor stays dry.
The Tap Goes Off First, and the Needle Is Usually the Answer
Everything here comes down to two habits. The fuel tap goes off before you do anything else, including looking, because it removes the pressure driving the leak and costs nothing. And when a machine leaks fuel while standing rather than while running, look at the float needle first, because the bowl is the only part of the system that fills up when nothing is asking it to.
The rest is unglamorous maintenance that manufacturers publish and almost nobody does: replace the fuel line on a schedule rather than on failure, buy the gasket kit before you open the bowl, fit the certified hose rather than the one at the end of the aisle, and stop filling the tank to the brim in a cool garage in April.
And if you are reading this standing over a machine that smells of petrol, the job for today is not the repair. It is the tap, the plug lead, some cat litter and an open door. The carburetor will still be there tomorrow, which is a sentence I would rather write than the alternative.