Last Updated on October 4, 2026 by Umar Farooq
How do you pressure wash a fence without wrecking it? Match the pressure to the material: 500-800 PSI for softwood pine and cedar, up to 1,500 PSI for hardwood, and 1,000-1,500 PSI for vinyl. Use a 25-degree nozzle, hold the wand 12-18 inches back, and always move along the grain of each board. Too much pressure tears open the wood fibres, and that damage only becomes visible a week later once the fence dries.
Why Fence Material Decides Your Pressure Setting
Most people learning how to pressure wash a fence make one assumption that causes all the trouble: they treat a fence as a single surface. It is not. A cedar privacy fence, a vinyl panel fence and a chain link run share a shape and nothing else. Their tolerance for water pressure varies by a factor of three.
Softwoods dominate residential fencing in North America. Pine, spruce, fir and western red cedar are cheap, easy to cut, and take stain well. They are also soft enough to dent with a thumbnail. Water leaving a pressure washer nozzle at 2,000 PSI carries far more force than a thumbnail, and it will carve visible grooves into pine in under two seconds of contact.
Hardwoods such as ipe, cumaru and oak are denser and absorb roughly double the pressure before showing marks. Vinyl and composite have no grain to tear, but they craze, haze or crack under a concentrated jet. Metal is the most forgiving, and the only real risks are stripping powder coating or driving water into a hollow post.
So identify your material before you connect the hose, not after you have etched a stripe into the third board. If you are unsure whether your washer suits the job, our guide on what PSI pressure washer you need covers machine sizing first.
PSI and Nozzle Settings by Fence Material
This is the single most useful reference in this article. Print it, or at least photograph it before you start.
| Fence material | Safe PSI range | Nozzle | Distance | Detergent needed? |
| Pine, spruce, fir (softwood) | 500-800 | 25° green | 18-24 in | Yes, wood cleaner |
| Western red cedar | 500-1,000 | 25° green | 18-24 in | Yes, wood cleaner |
| Redwood | 500-1,000 | 25° green | 18-24 in | Yes, wood cleaner |
| Pressure-treated pine | 800-1,200 | 25° green | 12-18 in | Yes, wood cleaner |
| Hardwood (ipe, oak, cumaru) | 1,200-1,500 | 25° green | 12-18 in | Optional |
| Vinyl / PVC fencing | 1,000-1,500 | 40° white | 18-24 in | Yes, mild detergent |
| Composite fencing | 1,200-1,500 | 40° white | 12-18 in | Yes, oxygen bleach |
| Chain link (galvanised) | 1,500-2,000 | 25° green | 12-18 in | Optional |
| Aluminium / wrought iron | 1,200-1,800 | 40° white | 12-18 in | Mild detergent |
| Painted or stained wood | 400-600 | 40° white | 24+ in | Yes, mild detergent |
Two notes on this table. First, PSI at the pump is not PSI at the surface. Pressure drops off sharply with distance, which is why the distance column matters as much as the number. A 2,000 PSI machine held two feet back delivers roughly the same impact as a 1,200 PSI machine held one foot back. Second, if your washer has no adjustable pressure, the nozzle and your distance are your only controls. Swapping a 15-degree tip for a 40-degree tip cuts the impact force dramatically. Our pressure washer nozzle chart explains what each colour actually does.
How to Pressure Wash a Fence Step by Step
The order of operations matters. Doing step three before step one is how people end up replacing boards.
Step 1: Inspect and repair loose boards first
Walk the whole fence and push on every picket. Any board that flexes, rattles or has a popped nail will be blasted loose, and a loose board caught by a jet can split along its whole length. Drive the nails back or, better, replace them with exterior screws. Check posts at ground level too, because rot at the base is common and a soft post can snap under a wand.
Look for existing splits. A hairline crack is an entry point: pressurised water forced into it expands the crack and drives moisture deep into the end grain, where it causes rot months later. Fill or replace badly split boards first. This inspection takes fifteen minutes and routinely saves an afternoon of repairs.
Step 2: Protect plants, pets and the neighbour’s side
Fence detergents are usually alkaline or bleach-based, and both will scorch foliage. Water your garden beds thoroughly before you start, because wet soil and wet leaves dilute any overspray that lands on them. Then cover anything close to the fence with plastic sheeting or a drop cloth.
Do not forget the far side. A privacy fence has gaps, and detergent-laden spray travels straight through onto your neighbour’s flower bed, furniture or parked car, so knock on the door first. Move your own furniture, grill and bins ten feet clear, and shut nearby windows, because a stray jet drives water past a window seal easily.
Step 3: Apply detergent and give it dwell time
Detergent does the actual cleaning. Pressure only rinses. That is the most misunderstood point in fence washing, and grasping it lets you drop your pressure by half without cleaning any worse.
Apply a wood or fence cleaner with the black soaping nozzle, working bottom to top in long even strokes. Bottom-to-top prevents streaking, because clean detergent running down over dry dirty wood leaves visible tracks. Simple Green’s wood fence cleaning guide recommends a 3-5 minute dwell. Do not let the cleaner dry; on a hot day that takes four minutes, so work in six to eight foot sections and re-wet if the surface goes matte.
Step 4: Test the least visible panel and let it dry
Find the panel behind the shed, the back of the gate, the section facing the alley. Wash a two-foot square with your intended settings. Then stop and wait.
This is the step almost everyone skips, and it separates a good result from a ruined fence. Wet wood hides damage completely: water fills the torn fibres and flattens everything into a uniform rich brown that looks fantastic. Give the test patch four hours in sun, or overnight if it is cool, then run your bare palm across it. If it feels like a cat’s tongue, drop 200 PSI or move six inches further back and test again.
Step 5: Spray with the grain in overlapping passes
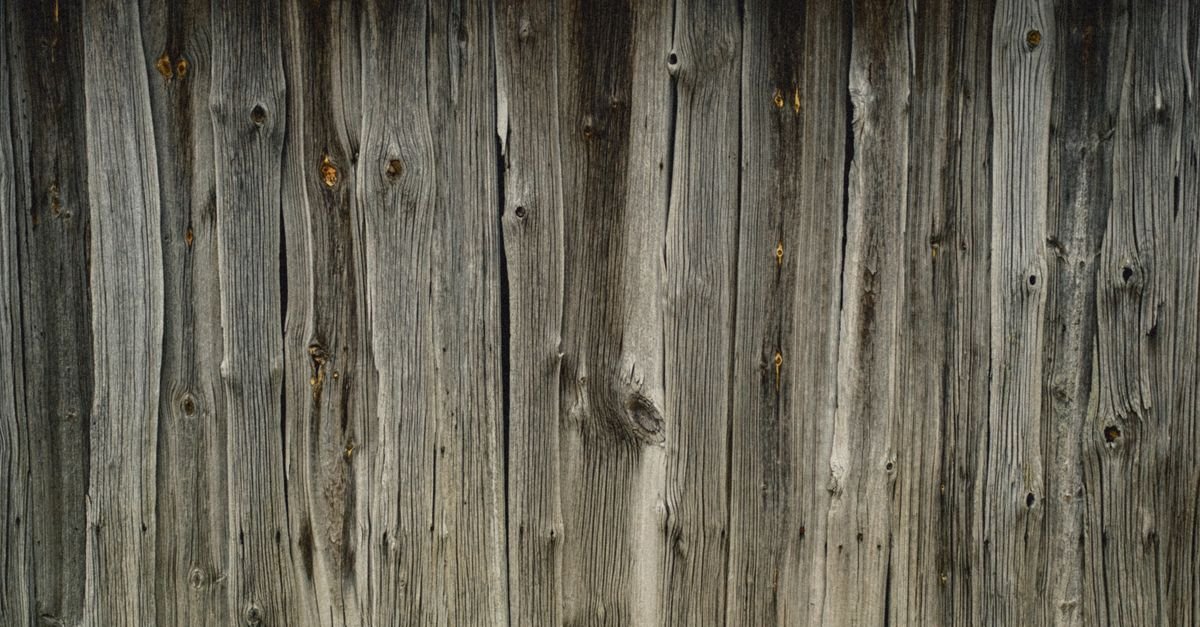
Wood grain runs along the length of each board. On a vertical picket fence that means spraying top to bottom, following the board. On a horizontal board fence it means spraying side to side. Spraying across the grain forces water underneath the fibres and lifts them, which is exactly the damage you are trying to avoid.
Keep the wand moving at roughly one foot per second. Never pause, and never let the jet dwell on one spot. Overlap each pass by about a third of its width, because a clean pass next to a dirty pass leaves a stripe that stays visible until the wood weathers again. Finish each board completely before moving on.
Step 6: Rinse top to bottom and check for lap marks
Once the detergent has worked, switch to the 40-degree nozzle and rinse from the top down so dirty runoff never crosses clean wood. Rinse the far side too if detergent went through the gaps.
Then walk the fence line from fifteen feet away with the sun behind you. Lap marks, missed patches and pressure stripes are nearly invisible up close and obvious from a distance. Fix them while everything is still wet, because touching up a dry fence leaves a halo.
Raised Grain: The Damage That Shows Up a Week Later
This is the failure mode that deserves its own section, because it is delayed and therefore consistently underestimated.
When a high-pressure jet hits soft wood it does not simply remove dirt. It shears the bond between wood fibres and lifts their loose ends away from the surface. While the fence is soaking wet, those lifted fibres lie flat and swollen, so the fence looks clean, even and better than before. You put the washer away pleased with yourself.
Over the following three to seven days the wood dries and those fibres shrink, curl and stand up. The surface turns fuzzy, then rough, then splintery. Professionals call it furring or grain raising, and it is not cosmetic. A furred surface has far more exposed end grain, so it absorbs water faster, weathers faster and grows mildew faster than an undamaged board.
The repair is sanding: 80-grit followed by 120-grit on an orbital sander knocks the fuzz down, but it takes hours per panel and removes wood that is not coming back. Prevention is the only sensible strategy: lower pressure, wider nozzle, greater distance, and the dry test patch from Step 4.
How to Pressure Wash a Fence Built From Vinyl
Vinyl fencing has no grain to raise, which makes it far more forgiving, but it introduces two different problems.
The first is chalking. White vinyl exposed to years of sun develops a powdery oxidised layer on the surface. Pressure washing removes it, and the panel underneath looks brighter than the panels you have not reached yet. Wash the entire fence in one session or you will end up with a two-tone fence.
The second is water intrusion. Vinyl panels slot into hollow posts and rails, and a jet aimed at a seam will drive water into the cavity where it sits and breeds algae. Never aim upward into a rail joint. Fence Authority’s vinyl fence washing guide suggests starting at 500-800 PSI from three to four feet back and moving closer only if dirt persists, which is sound advice for exactly this reason.
For green algae film on the shaded north side, a mild detergent with five minutes of dwell will do more than any amount of extra pressure. The same chemistry that works on siding works here; see our notes on pressure washing vinyl siding for detergent handling.
Chain Link, Aluminium and Wrought Iron Fences
Metal is the easiest fence material to wash and the one most likely to be over-washed.
Galvanised chain link tolerates 1,500-2,000 PSI without complaint. The mesh is open, so most of your water passes straight through and soaks whatever is behind it. Stand at a slight angle rather than straight on. Rust at the bottom rail and tie wires is common and pressure will not fix it; that needs a wire brush and a rust-inhibiting primer.
Aluminium and wrought iron panels are usually powder coated. A concentrated jet at close range chips that coating, particularly at edges and welds where it is thinnest. Use the 40-degree nozzle, stay a foot back, and inspect afterwards. Touch up any chip within days, or rust will start under the coating and spread invisibly.
Composite and Painted Fences
Composite fencing is wood flour bound in plastic. It cannot fur, but a narrow nozzle scores the plastic binder, and once scored the surface holds dirt permanently. Stay at 1,200-1,500 PSI with a 40-degree tip. Most manufacturers specify a maximum PSI in their warranty documents, and exceeding it can void coverage. The same limits apply to composite decking.
Painted and stained fences are the most fragile surface on the list. Paint is a film sitting on the wood, and pressure gets underneath any edge where that film has already lifted, then peels it in sheets. If your paint is sound, 400-600 PSI with a 40-degree nozzle held two feet back cleans it without stripping it. If the paint is already flaking, you are stripping rather than cleaning, so plan to repaint. Our guide on pressure washing painted wood covers the judgement call.

Grey Weathered Wood Is Sun Damage, Not Dirt
This expectation ruins more fences than any other. A homeowner looks at a silver-grey fence, assumes the grey is dirt, and turns the pressure up until it comes off. It does come off eventually, along with a millimetre of wood.
Grey wood is not dirty. Ultraviolet light breaks down lignin, the natural polymer that binds wood fibres and carries most of their colour. As lignin degrades it washes away in rain, leaving bleached cellulose fibres that scatter light and read as silver-grey. That is a chemical change roughly 0.1 to 0.5 mm deep, and no amount of water pressure reverses a chemical change. Pressure only removes the affected layer, unevenly.
What a wood brightener actually does
The proper tool is oxalic acid, sold as deck and fence brightener. It works chemically rather than mechanically, converting the oxidised, tannin-darkened and UV-degraded compounds at the surface into colourless salts that rinse away and reveal sound wood underneath. It also neutralises the alkalinity left by bleach or percarbonate cleaners, which matters because alkaline residue stops stain bonding properly.
The sequence is clean, rinse, apply brightener, dwell five to ten minutes, rinse thoroughly. On a grey but otherwise sound fence this restores far more colour than pressure alone, without removing wood. Simple Green’s deck cleaning guidance makes the same point from the other direction: avoid maximum pressure, because force damages fibres.
Detergent Choice: Bleach, Oxygen Bleach or Plain Soap
Three chemistries cover almost every fence problem, and picking correctly saves you pressure.
Sodium hypochlorite, ordinary household bleach, kills mould, mildew and algae fast, so it is the right choice for black spotting and green film. Dilute it roughly one part bleach to four parts water, keep dwell under ten minutes, and rinse hard. The downside is real: it damages plants, corrodes metal fixings, and can bleach bare wood unevenly if left too long.
Sodium percarbonate, sold as oxygen bleach, is the safer default for bare wood. It releases hydrogen peroxide and washing soda in water, lifts dirt and organic staining, and does not harm plants at normal dilutions. It needs warm water and a longer dwell of ten to fifteen minutes.
Plain fence detergent handles ordinary dust, pollen and cobwebs. If your fence is merely dusty rather than biologically fouled, that is all you need, and it lets you work at the bottom of the PSI range.
Never mix bleach with an acid brightener or with ammonia. Chlorine gas is a genuine hazard. Rinse completely between steps.
Common Mistakes and What Each One Costs
| Mistake | What happens | Cost to fix |
| Using a 0° or 15° nozzle | Carved lines, gouged boards | Sanding or board replacement |
| Holding the wand under 6 inches | Furring within a week | Full sanding, 2-4 hrs per panel |
| Spraying across the grain | Lifted fibres, fuzzy surface | Sanding, plus faster future rot |
| Skipping detergent | Needing 2x pressure to clean | Higher damage risk throughout |
| Letting detergent dry on wood | Permanent white streaking | Re-clean with brightener |
| Not testing a hidden panel first | Damage discovered fence-wide | Whole-fence repair |
| Washing loose boards | Split boards, lost pickets | Replacement lumber and labour |
| Staining before wood is dry | Blotchy finish, peeling stain | Strip and re-stain entire fence |
| Aiming up into vinyl rail seams | Water trapped inside posts | Algae growth, hard to reach |
| Chasing grey with more pressure | Wood removed, still grey | Sanding, brightener, possible replacement |
How Long to Let a Fence Dry Before Staining or Sealing
Staining wet wood is the second most common way to waste a weekend. Stain and sealer must penetrate the fibres, and if those fibres are full of water there is nowhere for the stain to go. It sits on top, dries blotchy and peels within a season.
| Conditions | Softwood fence | Hardwood fence | Painted fence recoat |
| Hot and dry, 85°F+, low humidity, full sun | 24 hours | 48 hours | 24 hours |
| Warm, 70-85°F, moderate humidity | 48 hours | 72 hours | 48 hours |
| Mild, 60-70°F, some cloud | 72 hours | 4 days | 72 hours |
| Cool or humid, under 60°F or 70%+ RH | 4-7 days | 5-7 days | 4-5 days |
| Shaded north-facing panels | Add 24-48 hrs | Add 48 hrs | Add 24 hrs |
The reliable field test is the water drop test. Flick a few drops onto the wood. If they bead up and sit there, the wood is still too wet or still sealed. If they soak in within ten to fifteen seconds, the wood is dry and open and ready to take stain. Test several panels, including the shaded ones, because the sunny side can be ready two days before the shaded side.
FAQ
What PSI is safe for a wood fence?
For softwoods such as pine, cedar and spruce, stay between 500 and 800 PSI. Pressure-treated pine handles 800-1,200 PSI. Dense hardwoods like ipe or oak tolerate up to 1,500 PSI. Always pair the pressure with an 18-24 inch working distance and a 25-degree nozzle, because distance changes the force at the surface as much as the pump setting does.
Should I pressure wash a fence before or after staining?
Always before, never after. Washing removes the dirt, mildew and degraded surface layer that would otherwise stop stain from bonding. Washing an already-stained fence at any meaningful pressure strips the stain unevenly and leaves you with a patchy finish. Clean first, let it dry fully, then stain.
Can I pressure wash a fence that is only one year old?
Yes, but it rarely needs it. New fences usually just need a rinse and a mild detergent. Pressure-treated lumber also needs to weather for three to six months before it will accept stain, so if your goal is staining, wash lightly and test with the water drop test rather than blasting a nearly new surface.
Why does my fence look fuzzy after pressure washing?
That is raised grain, caused by too much pressure tearing wood fibres apart. It appears three to seven days after washing, once the wood dries and the torn fibres curl upward. The only fix is sanding with 80-grit followed by 120-grit. Prevent it next time by dropping pressure, widening the nozzle and increasing distance.
Does pressure washing remove grey from a wood fence?
Not properly. Grey is UV damage to the lignin in the top layer of wood, not dirt sitting on top of it. Pressure removes the grey only by removing wood, which is uneven and wasteful. Use an oxalic acid wood brightener after cleaning, which converts the discoloured compounds chemically and restores far more colour without eroding the boards.
How long does it take to pressure wash an average fence?
A 100-foot residential fence takes roughly three to five hours including setup, detergent dwell, both sides and cleanup. Detergent dwell time is unavoidable and accounts for a large share of it. Working in six to eight foot sections rather than rushing the whole run is faster overall because you avoid re-treating dried detergent.
Do I need to wash both sides of the fence?
Yes, if you own both sides. Mildew and algae grow more heavily on the shaded side, and leaving that side untreated means the growth simply spreads back across. If the far side belongs to a neighbour, ask permission before washing it, and at minimum warn them so they can move belongings clear of overspray.
Can I use bleach on a wood fence?
Yes, diluted roughly one part bleach to four parts water, with a dwell under ten minutes and a thorough rinse. It is the fastest way to kill black mildew spotting. Oxygen bleach is gentler on the wood and on nearby plants and is the better default unless you have heavy biological growth. Never mix bleach with acid brighteners.
What nozzle should I use on a fence?
The 25-degree green nozzle is the standard choice for bare wood and chain link. Use the 40-degree white nozzle for vinyl, composite, powder-coated metal and any painted or stained fence. Never use the 0-degree red or 15-degree yellow tips on a fence; they concentrate enough force to carve visible lines into wood in under two seconds.
Will pressure washing damage my plants near the fence?
The water will not, but the detergent can. Soak surrounding soil and foliage with plain water before you start so any overspray is diluted, cover sensitive plants with sheeting, and rinse the plants again once you are finished. Oxygen bleach is far kinder to gardens than chlorine bleach if you have beds tight against the fence line.
Chemistry Cleans, Pressure Only Rinses
Knowing how to pressure wash a fence comes down to one principle: let chemistry do the cleaning and let pressure do the rinsing. Every serious fence failure, from carved lines to furred boards to peeled paint, traces back to someone compensating for weak detergent with extra force.
Set your machine to the low end of the range for your material. Fit a 25-degree tip on bare wood and a 40-degree tip on everything else. Repair loose boards, protect the garden, apply cleaner bottom to top, let it dwell, then test a hidden panel and wait for it to dry before you commit. Work with the grain, keep the wand moving, and rinse from the top down.
Be realistic about grey wood too. Silver boards are sunlight, not soil, and a brightener does what pressure never can. Give the fence two to four dry days before stain or sealer, use the water drop test rather than guessing, and it will still look right a year from now.