Last Updated on September 26, 2026 by Umar Farooq
Cleaning retaining wall block is mostly an ordinary masonry wash with one structural difference: a gravel drain sits a minimum of twelve inches behind the face, and the joint you are tempted to aim at is the front edge of it. Wash the faces, keep the wand square, and the wall will look years younger by lunchtime. Drive water and silt into the joints and you are working on the drainage system rather than the dirt.
That difference is the whole reason this page exists. A garden wall is a face. A retaining wall is a structure holding back several tonnes of soil, and behind it sits a deliberate assembly: a leveling pad, a zone of clean angular gravel, usually a perforated pipe, often a geotextile filter. None of it is visible, all of it is load-bearing in the sense that matters, and the only part you can reach is the part standing between the jet and the gravel.
I went into the Concrete Masonry & Hardscapes Association’s technical notes on segmental retaining walls looking for a cleaning pressure. There is not one. Across the guide to the system and the inspection guide — and I read both end to end — the words “clean” and “cleaning” appear about the gravel, not about the wall. What CMHA publishes instead is the drainage spec and a set of alignment tolerances measured in inches. That absence turned out to be more useful than a PSI figure would have been, because it points at what actually goes wrong on these walls, and it is not the finish on the block.
A Retaining Wall Is a Drain With a Decorative Front
Start with what the thing is, because almost every mistake downstream comes from treating it as cladding. CMHA defines segmental retaining walls as gravity walls that “rely primarily on their mass (weight) for stability” — concrete masonry units placed without mortar, dry stacked, resisting overturning and sliding through a combination of mechanical interlock, unit-to-unit friction or shear capacity, and sheer weight (CMHA, Guide to Segmental Retaining Walls).
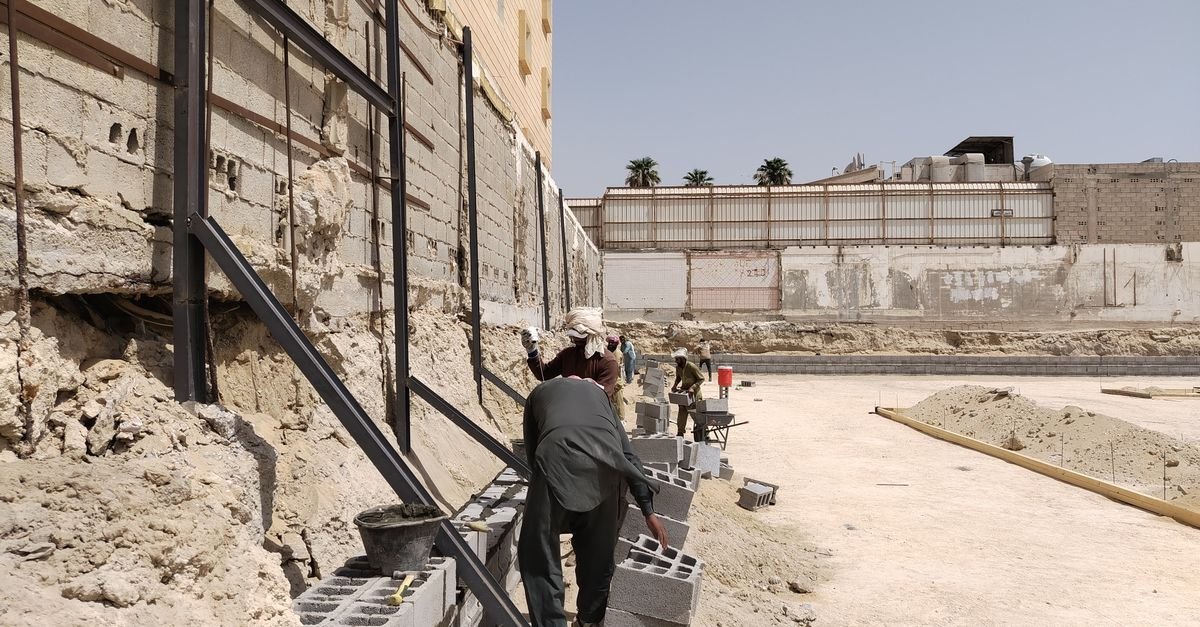
There is no mortar anywhere in that description. The blocks are not glued together and were never meant to be. They are heavy things stacked with a deliberate setback, and the reason your wall has not fallen over is arithmetic about mass, not adhesion.
Behind the face, CMHA lists the components: foundation soil, leveling pad, the units, retained soil, gravel fill, and on taller walls layers of geosynthetic soil reinforcement running back into the bank. The gravel fill is the part that matters to anyone holding a hose. CMHA describes it as “free-draining granular material placed behind the facing units to facilitate the removal of incidental groundwater and minimize buildup of hydrostatic pressure,” and specifies that it “should extend a minimum of 12 in. (305 mm) behind the SRW units regardless of the type.”
The gravel is there to get water out and to stop pressure building up behind the wall. A retaining wall that cannot drain is one being pushed on by water as well as soil.
Two more components complete the picture. CMHA’s inspection guide specifies the drainage pipe as perforated or slotted PVC or corrugated HDPE, minimum 3 in. diameter, “sloped to provide gravity flow,” and — the detail worth writing on your hand — set to “daylight at a maximum of 50 ft (15.2 m) or tie to storm system to evacuate water” (CMHA, Inspection Guide for Segmental Retaining Walls). And in some builds a geotextile filter sits between the gravel and the soil behind it, installed, in CMHA’s words, “to protect the gravel from clogging.”
Somebody was worried enough about fines getting into that gravel to specify a fabric to keep them out. Hold that thought for the next section.
The Gap Between Two Blocks Is Where the Water Is Supposed to Go
Here is the detail that reframes the entire job. CMHA’s inspection guide does not just say to put gravel behind the wall. Under gravel fill placement it lists three locations: in the cores of the units, “between the units,” and a minimum of 12 in. behind them. The gradation is specified too — “clean, ½ to ¾ in. (12 to 19 mm), angular or well-graded gravel with less than 5% fines.”
So the dark line between two blocks is not a joint in the masonry sense at all. It is the visible edge of a gravel zone, and that gravel has a published fines limit of five percent. The geotextile filter exists to protect it from silt arriving from the soil side. Nothing is specified to protect it from the front, because nobody designing the wall expected anything to arrive from there.
Then you turn up with a machine.
This is the one genuinely irreversible thing a homeowner can do to a segmental wall, and it is not scuffing the block. The units themselves are tough by specification: CMHA notes they are “manufactured of high compressive strength, low absorption concrete which helps make them resistant to spalling, scour, abrasion, the effects of freeze-thaw cycles, rot, and insect damage,” with ASTM C1372 capping water absorption at 13 lb/ft³ for normal-weight units. Your machine is not going to hurt that. What it can do is take the silt and biological film it has just liberated off the face and inject it, at whatever pressure you have selected, into the one zone on the whole site with a specified fines limit — while simultaneously flushing the loose gravel out of the joint and onto your feet.
A clogged drainage layer does not announce itself. It waits for the wettest fortnight of the year and then stops draining, and by then nobody remembers that the wall got washed in June.
The joints are also not weep holes, and it is worth being clear about that, because the word comes up a lot in searches for this. A mortared wall has to be given explicit outlets, because its face is impermeable. A dry-stacked segmental wall has no weep holes for the same reason a colander has no weep holes. The whole face is the outlet.
One more thing lives at the bottom of the wall and takes damage quietly. CMHA’s embedment recommendation is that a minimum soil cover be provided in front of the retaining wall, and that it be “never less than 6 in. (152 mm).” That buried strip is part of what stops the base course sliding forward. A wand held at the toe, working the mud off the bottom two courses, is excavating it. Six inches is not much to lose.
White Bloom on a Retaining Wall Is the Drain Reporting In
Sooner or later your block goes chalky white, in streaks or patches, usually worse after a wet winter. That is efflorescence — soluble salt carried out of the masonry in solution and left behind when the water evaporates — and the chemistry, the escalation ladder from dry brush to proprietary cleaner, and the reasons hosing it makes it worse are all worked through in our guide to removing efflorescence from brick. None of that changes on block. Go and read it there.
What changes is the diagnosis, and it changes completely.
On a house wall, efflorescence is a fault report. Salt on the outside of a brick elevation means water is getting into a structure that was designed to keep it out, and the useful response is to find the leak. On a retaining wall, water arriving at the back of the masonry is not a leak. It is the specification. CMHA’s gravel fill exists precisely “to facilitate the removal of incidental groundwater,” which is a polite way of saying the designer knew groundwater would show up and built a route for it. Salt appearing on the face of a segmental wall is that route being used.
So the question a retaining wall asks is not “where is the water getting in.” It is “is the water getting out.” That is a different question with a different answer, and it has a check attached that nobody on the first page of search results mentions.
Go and find the daylight point. CMHA requires the drain pipe to daylight within a maximum of 50 feet or tie into a storm system, so somewhere within fifty feet of any spot on your wall there is an outlet — at the low end, usually at the toe, often buried in a shrub because nobody flagged it to the gardener. Look at it two or three days after heavy rain. If water is trickling out, the system is working and your white bloom is exhaust. If it is bone dry while the wall above it is damp and blooming, you have either a blocked pipe or a wall built without one, and cleaning the face is the least important thing on your list.
There is a pattern worth reading, too. Efflorescence spread fairly evenly across an elevation is the sheet flow the drain was designed for. Efflorescence concentrated in one vertical band, on an otherwise clean wall, is a point source — a downspout discharging behind the wall, a leaking irrigation line, a spring the excavation found. The wall is not telling you it is dirty. It is telling you where the water is.
Block, Mortar and Timber Fail in Three Different Places
“Retaining wall” covers three constructions that look similar from the patio and behave nothing alike under a hose. Identify yours before you pick a nozzle.
| Dry-stacked segmental block | Mortared masonry or brick | Timber sleepers | |
| What holds it up | Mass, mechanical interlock and friction between units | The mortar, which makes the whole wall one rigid body | Stacked timbers tied back to buried deadmen or posts |
| Where the drainage is | Gravel in the cores, between the units and 12 in. behind | Whatever outlets were built in — the face itself is impermeable | Gravel behind, with the gaps between timbers as relief |
| What a jet at the joint does | Flushes gravel out, drives fines into the drainage zone | Cuts the mortar, which here is the structure and not a filler | Forces water into checks, splits and end grain |
| Published cleaning pressure | None — not by CMHA, not by any block maker I could find | 400 PSI ceiling for brickwork, from the brick industry | None found; treat it as exterior timber |
| The fault that stops the job | Alignment out by more than 1.25 in. over 10 ft | Stair-step cracking running through the joints | Soft, punky timber at the soil line |
| Wand angle | Square to the face or angled slightly down, never up | Square, and stay off the joints entirely | Along the grain, never across the end grain |
The mortared wall is the one people most often misjudge, because it looks like the sturdiest of the three. It is also the only one where the joint is doing structural work: on a dry-stacked wall the joint is a drainage path, and on a mortared wall it is the wall. Mortar is deliberately made softer than the masonry around it, and the pressure bands, the scratch test that tells you whether your mortar will survive contact with water at all, and the era-by-era ceilings are set out in our guide to pressure washing brick. If your retaining wall has mortar in it, that is the page that governs your pressure, not this one.
Timber earns its own row because it is the only one of the three where the material itself is consumable. The Western Wood Preservers Institute’s residential use-category guide lists a landscape wall under Ground Contact, Use Category 4A or higher (WWPI, Specifying with AWPA Use Categories for Construction) — the category for wood in ground or fresh-water contact, exposed to all weather cycles including prolonged wetting. A sleeper wall already has one face permanently damp against soil. The visible face is the only part of it that ever gets to dry, which makes a pressure washer aimed into the gap between two sleepers an oddly targeted attack on the wall’s only advantage.
Cleaning Retaining Wall Stains That Are Arriving From Behind
Now the honest part, and it is the reason this page has a limit section instead of a maintenance calendar. Cleaning retaining wall faces works beautifully on anything that landed on them and does nothing lasting about anything that came through them.
Washing genuinely fixes: mud splash off the path, atmospheric soiling, tannin staining from leaf litter sitting in the bed above, and the green or black biological film that covers any damp shaded masonry. Lichen is the slow one in that list, because it is partly inside the stone rather than on it, and it is handled properly in our guide to removing lichen.
Washing does not fix: a stain that reappears in the same three square feet every spring, a dark band tracking the line of something buried, or a wall that goes blotchy from the bottom course upward. Those are being fed. You can clean them off, and they will come back on the schedule the water keeps, which on most sites is annual. There is no shame in washing a wall cosmetically — but know which job you are doing, because the second one is a drainage job wearing a cleaning job’s clothes.
The method itself is short, and none of it involves more pressure:
1. Clear the bed above the wall first. Leaf litter and soil piled against the top course is both the tannin source and a dam.
2. Pre-wet and apply the cleaner at low pressure, bottom to top, through a soap nozzle or a pump sprayer. Let it dwell. Do not let it dry on the block.
3. Agitate with a stiff fibre brush. Never a wire brush on masonry — it leaves iron particles in the pores that rust out as orange streaks later.
4. Rinse with the widest tip you own, wand square to the face or angled slightly down. Never angled up into a joint. Up is where the gravel is.
5. Keep the wand away from the toe. That is where the six inches of embedment soil lives.
6. Check the daylight point afterwards. You have just put a lot of water on a drainage structure; watching where it comes out is free.
One wrinkle on step four. The house rule across this site is to apply chemistry bottom to top and rinse top to bottom, because gravity helps and a chemical running down a dry wall leaves stripes. If your rinse water is carrying dissolved salt off an efflorescence patch, that inverts — you rinse bottom to top so the solution never runs over dry, clean block you have not reached yet. The full argument for that reversal, and the conservation sources behind it, sit in our guide to removing graffiti. Acknowledge it, apply it on salt and pigment, and go back to top-down for ordinary dirt.
Finally, a retaining wall has a planted bed on top of it by definition, and usually another at its foot. Runoff from the face goes into one or both, which makes protecting plants when pressure washing less optional here than on a driveway.
Stop Washing at an Inch and a Quarter in Ten Feet
Every page on this topic says to look for bulging and leaning. None of them says how much bulge counts, which makes the advice unusable — walls are hand-built from stacked units and none of them is perfectly straight. CMHA publishes the number, and it is the most useful thing in either document.
From the inspection guide’s construction tolerances, achievable with good technique:
| What you are measuring | Published tolerance |
| Horizontal alignment, straight runs | ±1.25 in. (32 mm) over 10 ft (3 m), 3 in. (75 mm) maximum |
| Vertical alignment | 1.25 in. (32 mm) maximum over 10 ft, 3 in. maximum |
| Rotation from the specified wall batter | ±2 degrees |
| Differential settlement between two points | Not more than 1% of the distance between them |
| Soil cover in front of the base course | Never less than 6 in. (152 mm) |
Measuring it takes a mason’s line and ten minutes. Pin the string to the face at each end of a straight run, at two different heights, and look at the gap at the middle. An inch of daylight is within tolerance. Three inches is at the published maximum. A course that has stepped forward far enough to see from the patio is past it.
CMHA is also explicit that not every imperfection is a crisis, and this is the sentence that will save somebody an unnecessary phone call: “Some post-construction movement, and gapping and cracking of blocks may be present that is not necessarily a sign of imminent failure, especially if horizontal and vertical alignment is maintained.” Gaps opening between units are normal on a flexible structure — CMHA’s own pitch for the system is that “the flexible nature of segmental retaining walls allows the units to move and adjust relative to one another without visible signs of distress.” Losing the line is the problem. A gap is not.
So, plainly. If the wall is out of line by more than the table above, if a course has rotated forward, if the drain outlet is dry while the wall is wet, or if the base course is no longer buried, washing is not the job and a pressure washer will make the diagnosis harder, because a freshly cleaned wall hides the mud tracks and weathering lines that tell an engineer how long the movement has been going on. Clean it after somebody has looked at it.
There is a height at which this stops being a homeowner’s call entirely. CMHA notes that the 2012 International Building Code requires a building permit for earth retaining structures over 4 ft in total height, “or less if they support a surcharge” — a surcharge being anything loading the soil above, such as a driveway, a shed or a parking area. Its own design guidance splits at the same point: under 4 ft from the leveling pad to the top of the wall, use the design chart from the system’s manufacturer; over 4 ft, have the design section “reviewed/prepared by a registered professional.”
Measure from the leveling pad, not from the ground you are standing on. Walls are routinely taller than they look, because the bit you are meant to have buried does not show.
FAQ
What PSI should I use for cleaning a retaining wall?
Nobody publishes one, and I went looking specifically. CMHA’s segmental retaining wall documents contain no cleaning pressure, and I could not find a PSI figure published by a block manufacturer either. The pages ranking for this query do not give one, which for once is not a criticism — there is nothing to quote. What I can tell you is where the number would matter, and it is not the face of the block: it is the joint and the toe. Use the widest tip you own, keep the wand square to the wall, and if the wall has mortar in it, the 400 PSI ceiling published by the brick industry applies.
Can I pressure wash the gap between retaining wall blocks?
No, and it is the one instruction on this page I would call absolute. CMHA specifies gravel fill placed in the cores of the units, between the units, and 12 in. behind them, to a gradation of clean angular ½ to ¾ in. stone with less than 5% fines. Jetting the gap flushes that stone out and replaces it with the silt you just took off the face. It also feels productive, which is the trap.
Why does white powder keep coming back on my retaining wall?
Because on a retaining wall, water moving through the masonry is the design rather than a defect. The gravel behind the blocks exists to remove groundwater, and salt carried out in that water crystallises on the face as it dries. The removal method is dry-brushing rather than washing, and it is covered in full in our efflorescence guide. The retaining-wall-specific question is whether the water is leaving properly, which you check at the drain outlet, not at the wall.
Is the bottom course of a retaining wall supposed to be buried?
Yes. CMHA’s embedment recommendation varies with the slope in front of the wall but is never less than 6 in. of soil cover. That buried strip helps resist the base course sliding forward. If you can see the leveling pad, or the bottom course is sitting proud on bare ground, something has eroded and the fix is soil and grading rather than cleaning. It is also a reason to keep the wand off the toe and the runoff moving away from it.
Should I seal a retaining wall after cleaning it?
I would be cautious, and I would want to know which wall I had. The face of a dry-stacked segmental wall is a permeable surface on a structure whose entire drainage strategy is to let incidental groundwater out. CMHA’s tech notes do not discuss sealing at all — that is an absence, not a prohibition, and I am not going to convert it into one. But the general mechanism by which a coating on damp masonry traps salt crystallisation just behind the surface is well documented and is set out in the efflorescence guide. If you seal, do it on a wall that has had a full dry spell and is not still discharging water.
There are plants growing out of my wall. Will washing get rid of them?
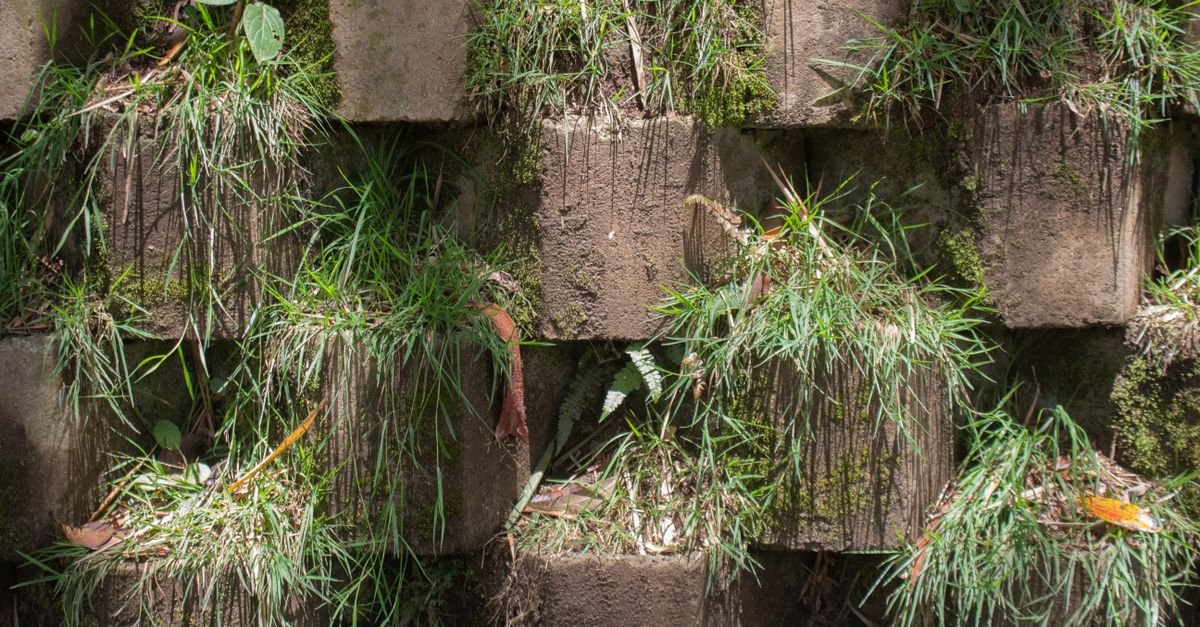
It will remove the green and leave the root. Seedlings in a segmental wall are rooted in the gravel between and behind the units, which is a well-drained, sheltered, lightly fertilised growing medium that any weed would choose deliberately. A jet strong enough to reach the root is a jet strong enough to move the gravel, so the answer is to pull them by hand, ideally after rain, and to keep soil and leaf litter off the top course so the next lot has nowhere to germinate.
How often does a retaining wall need cleaning?
Less often than the internet suggests, and the useful annual habit is a different one. Wash when growth or staining is genuinely visible — for most walls that is every two to three years, and a shaded north-facing wall more often. What is worth doing every year is walking the wall with a string line, checking that the base course is still buried and confirming that the drain outlet runs after rain. That inspection protects the wall. The wash protects the photographs.
Read the Alignment, Then the Stains
Run a string line along the face before you run a hose over it. An inch and a quarter of deflection over ten feet is within what CMHA says good construction achieves; three inches is the published maximum; a course you can see has moved is past both, and no amount of cleaning changes the arithmetic of a gravity wall.
If the line holds, wash it and enjoy it. Widest tip you own, wand square to the face or tipped slightly down, cleaner doing the work at low pressure, stiff fibre brush on the stubborn patches, and nothing at all aimed up into the gap between two blocks — because that gap is full of clean angular stone specified to contain less than five percent fines, and you are standing there holding several gallons a minute of freshly made fines.
Then go and find the pipe. It daylights within fifty feet, it is probably under a shrub, and two days after the next downpour it should be running. A retaining wall that drains will outlive everyone reading this. One that does not will stay beautifully clean right up until the spring it stops being a wall.